If you love the rich, nutty taste of peanut butter and the irresistible crunch of Butterfinger candy, then these Butterfinger Peanut Butter Bombs are your next must-make treat. They’re sweet, salty, crunchy, and creamy all at once—the kind of no-bake dessert that feels indulgent without taking hours to prepare.
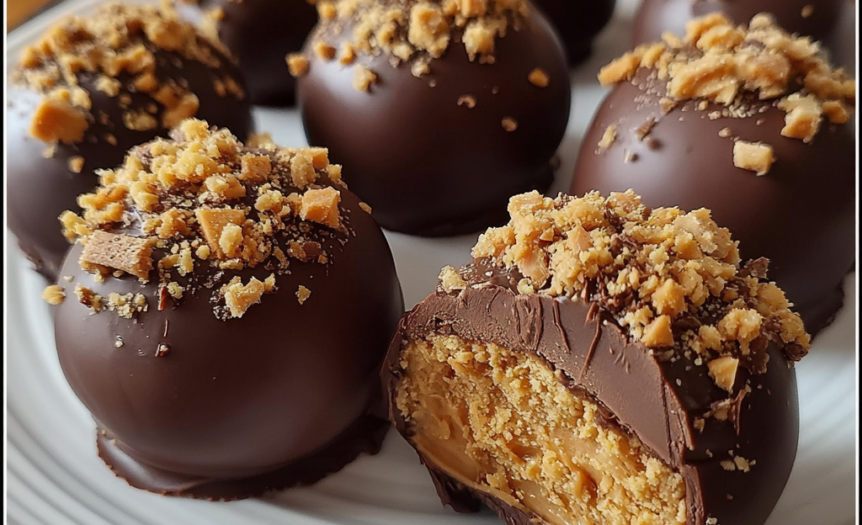
These peanut butter bombs combine the classic flavors of a Butterfinger bar with a smooth peanut butter center, all wrapped in a chocolate shell and topped with crunchy candy bits. They’re perfect for parties, holidays, or anytime you’re craving a quick and easy dessert that delivers big flavor in a small package.
Let’s get into what makes these bite-sized treats so addictive and how you can whip up a batch in no time.
Why You’ll Love Butterfinger Peanut Butter Bombs
- No Baking Required: Easy to make without turning on the oven.
- Perfect Texture: Creamy peanut butter filling with a crisp chocolate shell and crunchy Butterfinger topping.
- Quick to Prepare: Minimal ingredients, fast assembly.
- Great for Sharing: Perfect for potlucks, parties, or gifting.
- Customizable: Swap in other candies or nut butters if you like.
These treats are basically everything you want in a dessert—sweet, salty, and satisfyingly rich.
Ingredients You’ll Need
Here’s a quick list of what you need to make Butterfinger Peanut Butter Bombs:
- 1 cup creamy peanut butter (not natural-style): This forms the soft, creamy center.
- ¼ cup unsalted butter, softened: Adds richness and helps the filling set.
- 1½ cups powdered sugar: Sweetens and firms the filling.
- ½ teaspoon vanilla extract: Adds flavor depth.
- Pinch of salt: Balances the sweetness.
- 8 oz chocolate (milk or semi-sweet), chopped or in chips: For coating.
- 1 cup Butterfinger candy bars, crushed: Adds the signature crunch and flavor.
Optional: Add 1 tablespoon of coconut oil or shortening to the chocolate for easier dipping.
Step-by-Step Instructions
Step 1: Make the Peanut Butter Filling
In a mixing bowl, combine the peanut butter and softened butter. Beat with a hand mixer or stir well until smooth and fully blended. Add in the powdered sugar, vanilla, and a pinch of salt. Mix until the filling becomes thick and dough-like but still soft.
If the mixture feels too sticky, add a bit more powdered sugar, one tablespoon at a time.
Step 2: Shape into Balls
Using a small cookie scoop or tablespoon, portion the mixture into balls. Roll each one between your palms for a smooth shape. Place the peanut butter balls onto a parchment-lined baking sheet.
Once all the balls are formed, place the tray in the freezer for 20–30 minutes. This firms them up and makes dipping easier.
Step 3: Crush the Butterfingers
While the peanut butter bombs are chilling, place Butterfinger bars in a zip-top bag and crush them using a rolling pin or heavy object. You want small pieces—some fine, some a bit chunky—for a good mix of texture.
Step 4: Melt the Chocolate
In a microwave-safe bowl, melt the chocolate in 30-second intervals, stirring between each round until smooth. If desired, add a little coconut oil to help the chocolate stay smooth and glossy.
Step 5: Dip and Coat
Remove the chilled peanut butter balls from the freezer. Using a fork or dipping tool, dip each ball into the melted chocolate, letting the excess drip off. Place it back on the parchment-lined tray and immediately sprinkle crushed Butterfinger pieces on top before the chocolate sets.
Repeat with all the peanut butter bombs.
Step 6: Chill and Serve
Place the finished treats in the fridge for 30 minutes, or until the chocolate is fully set. Once hardened, transfer them to an airtight container.
They’re now ready to serve!
Tips for Success
- Use Non-Stick Tools: A small cookie scoop helps with uniform size. Line everything with parchment to avoid sticking.
- Freeze for Easy Dipping: Chilling the filling before dipping prevents it from falling apart in the warm chocolate.
- Work in Batches: Only take out a few peanut butter balls at a time to keep the rest firm.
- Use Good Chocolate: High-quality chocolate melts better and tastes better. Choose what you enjoy eating.

Storage and Freezing
- Refrigerator: Store in an airtight container in the fridge for up to 1 week.
- Freezer: Freeze for up to 2 months. Thaw in the fridge before serving.
These keep well and are great for making ahead of time for events or holidays.
Variations to Try
- Swap the Candy: Use crushed Reese’s, Snickers, or toffee bits for different flavor twists.
- Add Crunch: Mix crushed Butterfingers directly into the peanut butter filling for extra texture.
- Drizzle Topping: After the chocolate sets, drizzle with melted white chocolate for a fancy touch.
- Nut-Free Version: Use sunflower seed butter instead of peanut butter and skip the nut-based toppings.
Serving Suggestions
Butterfinger Peanut Butter Bombs are perfect for:
- Holiday cookie platters
- Party dessert tables
- Gifting in decorative boxes
- A sweet snack with coffee or milk
- A fun addition to a candy-themed dessert bar
Their bite-sized shape makes them ideal for sharing, and they’re always a hit at gatherings.
FAQ
Can I use natural peanut butter?
It’s not recommended. Natural peanut butter is too oily and may not set properly. Use a no-stir, creamy version for best results.
Can I use a different kind of chocolate?
Yes! Milk, dark, or even white chocolate all work. Use what you like best.
Can I make these dairy-free?
Yes. Use dairy-free butter and chocolate alternatives. Check the candy bar ingredients, or use a dairy-free crunchy candy substitute.
Do I have to crush Butterfingers on top?
No—but it’s part of what makes them special. You can skip it or use another topping like crushed pretzels or nuts if needed.
Final Thoughts
Butterfinger Peanut Butter Bombs are easy, satisfying, and packed with flavor. Whether you’re making them for a party, a holiday gift, or just to treat yourself, they deliver on all fronts—creamy, crunchy, chocolatey, and sweet.
No baking, no fancy equipment, and just a few pantry ingredients stand between you and these delicious peanut butter treats.
Give them a try and see why everyone loves them—just be prepared to make a second batch.