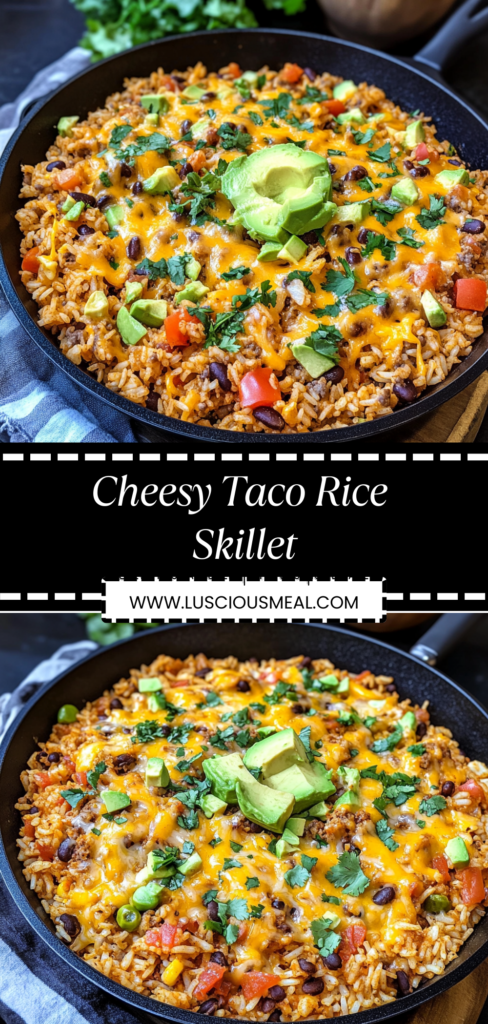
This cheesy taco rice skillet delivers the savory, spiced flavors of your favorite tacos in a hearty, one-pan meal that saves you from washing multiple dishes and assembling individual tacos. The rice soaks up all the seasonings while cooking, creating deeply flavored grains that complement the melted cheese and browned meat perfectly. If you enjoy this convenient meal format, you’ll also want to try enchilada rice, burrito bowls, or tex-mex casseroles that offer similar flavor profiles with different textures.
Why You’ll Love This Recipe
- True one-pan convenience – everything cooks in a single skillet from start to finish, significantly reducing cleanup time without sacrificing flavor or texture
- Family-friendly flexibility – easily customizable with different proteins, heat levels, and toppings to please both adventurous and picky eaters at the same table
- Budget-stretching ingredients – uses pantry staples and makes a modest amount of meat feed several people generously by incorporating filling rice and beans
- Perfect for meal prep – maintains its texture and flavor excellently when refrigerated, actually improving after a day as the flavors continue to meld
Ingredients Breakdown
Ground beef: The traditional protein choice for taco flavor, ideally using an 80/20 lean-to-fat ratio that provides enough fat for flavor without making the dish greasy. The fat renders during browning, creating the foundation that will flavor every other ingredient in the skillet. While you could use leaner meat, the extra fat contributes significantly to the dish’s satisfaction factor and helps prevent the rice from sticking to the pan during cooking. When browning, break the meat into small, even pieces similar to what you’d want for traditional tacos – not so fine that it disappears into the rice, but not so chunky that you get uneven bites. For a leaner option, substitute ground turkey or chicken, though you might want to add a tablespoon of olive oil to compensate for the reduced fat content.
Rice: Long-grain white rice works perfectly here, maintaining distinct grains that separate easily even when coated with sauce and cheese. Its mild flavor absorbs the seasonings beautifully without competing with them. Brown rice can substitute for additional fiber and nutrition, but requires adjustments – increase the liquid by 1/4 cup and expect to add 15-20 minutes to the cooking time. For best results, rinse the rice before adding it to remove excess starch that could make the final dish gummy. The rice serves as both a substantial extender that makes a modest amount of meat feed several people and a vehicle for capturing and distributing the taco flavors throughout every bite.
Taco seasoning: This spice blend provides the characteristic flavor that makes this dish unmistakably taco-inspired. While store-bought packets offer convenience, making your own with chili powder, cumin, paprika, garlic powder, onion powder, oregano, and a pinch of cayenne allows you to customize the heat level and avoid additives like anti-caking agents and excess sodium. The seasonings bloom in the fat rendered from the meat, developing deeper flavor than if they were simply stirred into liquid. The combination of warming spices with savory notes creates the complex flavor profile that makes tacos so craveable, while the slight heat builds with each bite without overwhelming the other ingredients.
Tomatoes: Canned diced tomatoes with their juice provide both moisture needed to cook the rice and acidity that balances the rich meat and cheese. Fire-roasted varieties add a subtle smoky dimension that enhances the taco flavor profile. The tomatoes break down partially during cooking, creating pockets of tangy brightness throughout the dish. Their natural sugars caramelize slightly when the skillet gets hot, adding depth to the sauce. For a smoother sauce with less distinct tomato pieces, crush them slightly before adding. If using fresh tomatoes instead, you’ll need about 1 1/2 cups diced plus an additional 1/4 cup of broth to compensate for the juice you’d get from canned.
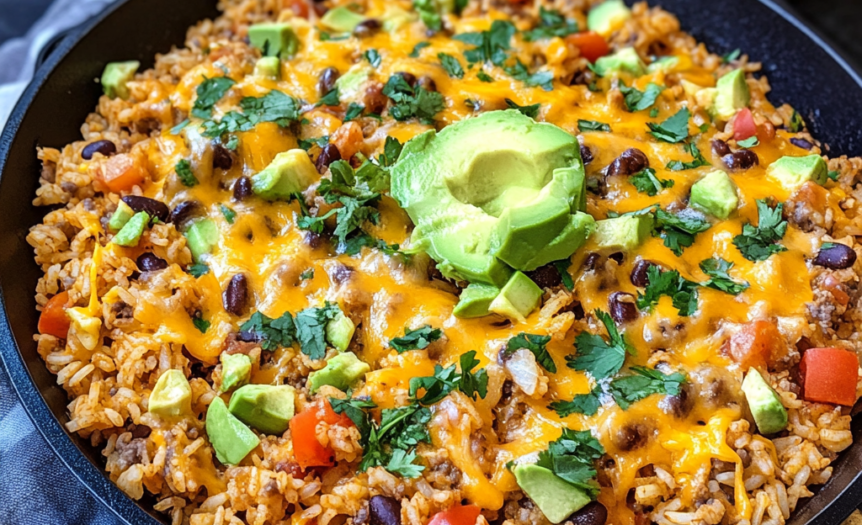
Cheese: Perhaps the most important ingredient for creating the comfort food appeal of this dish. A combination of cheeses works best – sharp cheddar provides the characteristic color and tangy flavor, while monterey jack or queso quesadilla cheese contributes superior meltability, creating those irresistible cheese pulls when serving. Grating your own cheese rather than using pre-shredded varieties results in better melting, as pre-shredded options contain anti-caking agents that can prevent smooth melting. The cheese serves multiple purposes – it binds ingredients together, adds richness that makes the dish satisfying, and creates the appealing browned top that signals a perfect finish to the cooking process.
Step-by-Step Instructions
- Begin by heating a large skillet (preferably cast iron or another heavy-bottomed pan with a tight-fitting lid) over medium-high heat until hot but not smoking. The right pan is crucial – you need one that retains heat well for even cooking and is large enough to hold all ingredients with room for stirring, typically 12 inches in diameter. Cast iron is ideal for its heat retention and natural non-stick properties once properly seasoned, but a stainless steel or non-stick skillet works well too. Avoid aluminum pans which can react with the acidic tomatoes.
- Add 1 pound of ground beef to the hot skillet, breaking it into small chunks with a wooden spoon or spatula. Season immediately with a pinch of salt and black pepper, which helps extract moisture and enhances browning. Cook undisturbed for 2-3 minutes to establish good caramelization on the bottom layer, then begin breaking it up into smaller, even pieces about the size of a pea. Continue cooking, stirring occasionally, until no pink remains and the meat has developed some browned edges, about 5-7 minutes total. This thorough browning creates the foundation of flavor through the Maillard reaction and prevents the unappetizing gray color that comes from steaming rather than searing the meat.
- Once the beef is fully browned, drain excess fat if there’s more than about 1 tablespoon in the pan. Some fat is beneficial for flavor and preventing sticking, but too much can make the final dish greasy. If using leaner meat that hasn’t produced much fat, you might add a tablespoon of olive oil before the next step. Either way, you want just enough fat to coat the bottom of the pan to bloom the spices properly.
- Add 1 medium diced onion and 1 diced bell pepper (any color, though red provides the sweetest flavor and most vibrant color contrast) to the meat in the skillet. Cook for 3-4 minutes, stirring occasionally, until the vegetables begin to soften and the onion becomes translucent but not browned. These vegetables add texture, nutrition, and aromatic flavor that permeates the entire dish. Cooking them with the already-browned meat allows them to absorb some of those flavors while releasing their own natural sweetness as they soften.
- Stir in 2-3 cloves of minced garlic and cook for just 30 seconds until fragrant, being careful not to let it brown or burn which would introduce bitterness. The brief cooking time releases the garlic’s aromatic compounds without risking the bitter flavors that develop with too much heat. The garlic provides a foundational flavor that supports the other seasonings without dominating.
- Add 2 tablespoons of taco seasoning (homemade or store-bought) and 1 tablespoon of tomato paste to the skillet. Stir continuously for 1 minute to coat the meat and vegetables evenly and allow the spices to bloom in the fat. This critical step activates fat-soluble flavor compounds in the spices that wouldn’t be released if they were added directly to liquid. The tomato paste caramelizes slightly during this process, developing umami notes that add depth to the final dish.
- Pour in 1 cup of uncooked long-grain white rice, stirring to coat each grain with the fat and spices. Continue stirring for about 1 minute until the rice turns slightly translucent around the edges. This toasting step adds a subtle nutty flavor to the rice and helps it maintain its structure during the subsequent simmering process. The oil coating also prevents the grains from sticking together as they cook.
- Add one 14.5-ounce can of diced tomatoes with their juice and 1 1/2 cups of chicken broth to the skillet. These liquids provide the necessary moisture for cooking the rice through a combination of absorption and steam. The ratio of liquid to rice is critical – too much creates soggy rice, while too little leaves it undercooked and crunchy. Use low-sodium broth if possible, as the taco seasoning and tomatoes already contribute significant salt to the dish.
- Stir in one 15-ounce can of rinsed and drained black beans or pinto beans. The beans add protein, fiber, and a creamy texture that complements the rice perfectly while extending the heartiness of the meal. Rinsing the beans removes excess starch and sodium from the canning liquid, which could otherwise make the dish too salty or cloudy.
- Bring the mixture to a boil, then reduce the heat to low and cover with a tight-fitting lid. Simmer undisturbed for 15-18 minutes until the rice is tender and has absorbed most of the liquid. The covered environment creates steam that cooks the rice evenly without requiring stirring, which would release starch and make the dish gummy. Check at the 15-minute mark by quickly lifting the lid and testing a few grains of rice – they should be tender but not mushy, with little visible liquid remaining.
- Once the rice is tender, remove the lid and stir in 1/2 cup of frozen corn kernels. The residual heat will quickly thaw and warm the corn while maintaining its fresh flavor and slight crunch, adding both textural contrast and sweet pops of flavor throughout the dish. The late addition prevents the corn from becoming overcooked and mushy.
- Sprinkle 1 1/2 cups of shredded cheese (a combination of cheddar and monterey jack works beautifully) evenly over the top of the mixture. Return the lid to the skillet and remove from heat, allowing the residual heat to melt the cheese for 2-3 minutes. This gentle melting method prevents the cheese from separating or becoming oily, as can happen with direct heat. The result should be a smooth, creamy layer that brings the whole dish together.
- Once the cheese has melted completely, remove the lid and let the skillet stand for 5 minutes before serving. This brief resting period allows the flavors to meld and the texture to set slightly, making it easier to serve in discrete portions rather than having it fall apart. During this time, prepare any desired fresh toppings to add color, freshness, and temperature contrast to the hot skillet contents.
Perfect Texture: What to Look For
The hallmark of a successful cheesy taco rice skillet is the perfect balance of textures. The rice should be tender but maintain its individual grain structure rather than clumping together. Each grain should be flavored through and through, not just coated with sauce. The meat should remain in distinct small pieces throughout the dish rather than disappearing into the mixture. The cheese layer on top should be completely melted and slightly stringy when served, but not browned (unless you prefer to run it under the broiler briefly for a spotted golden finish). The overall mixture should be moist and cohesive enough to hold together on a fork or spoon, but not so wet that liquid pools in the bottom of the skillet or so dry that it seems crumbly.
Customization Options
This adaptable recipe serves as an excellent canvas for variations based on preference or what’s available in your pantry. For a vegetarian version, substitute an additional can of beans or 2 cups of sautéed mushrooms for the ground beef. Spice enthusiasts can add a diced jalapeño with the bell pepper or stir in 1-2 tablespoons of diced canned chipotle peppers in adobo sauce for smoky heat. Create a creamy variation by stirring in 1/2 cup of sour cream after cooking but before adding the cheese. For additional vegetable content, add 1 cup of baby spinach or chopped kale in the last 2 minutes of cooking – the residual heat will wilt it perfectly without turning it mushy. During summer months, incorporate 1 cup of diced zucchini with the bell pepper for seasonal freshness.
Practical Tips
Storage: This dish maintains its texture and flavor beautifully when refrigerated in an airtight container for up to 4 days. The flavors actually develop and improve after a day as the seasonings permeate the rice more thoroughly. When storing, cool the skillet completely before transferring to containers to prevent condensation that could make the rice soggy. If you’re planning this specifically for leftovers, consider slightly undercooking the rice by 1-2 minutes, as it will absorb more moisture during storage and reheating.
Reheating: For the best texture when reheating, add a splash of water or broth (about 1 tablespoon per cup of mixture) to replace moisture lost during storage. Cover and reheat in the microwave at 70% power for more even warming that prevents the cheese from becoming rubbery. Alternatively, reheat in a skillet over medium-low heat with a few tablespoons of water and a lid to create steam. For a refreshed flavor when reheating, add a squeeze of fresh lime juice and a sprinkle of fresh cilantro after warming.
Make-ahead strategy: This recipe can be partially prepared in advance to streamline busy weeknights. Brown the meat with onions, peppers, and seasonings, then cool and refrigerate up to 2 days ahead. When ready to finish, reheat this mixture in the skillet, then proceed with adding the rice, liquids, and remaining ingredients. This approach saves about 15 minutes of active cooking time while preserving the freshly-made quality of the final dish.
Freezing guidance: While the complete dish can be frozen, the texture of the rice changes somewhat upon thawing and reheating. For better results, freeze the meat and vegetable mixture before adding rice, then thaw and complete the recipe with fresh rice when ready to serve. If freezing the complete dish, portion into meal-sized containers, cool completely, then freeze for up to 2 months. Thaw overnight in the refrigerator before reheating with additional moisture as described above.
Common Questions
Can I use instant rice instead of regular long-grain rice? Yes, but the cooking process changes significantly. If using instant rice, reduce the broth to 3/4 cup and the cooking time to about 5 minutes covered. Add the instant rice after the meat and vegetables are fully cooked and the liquid has come to a boil. This substitution sacrifices some flavor development in the rice but cuts the cooking time considerably for busy nights.
How do I prevent the rice from sticking to the bottom of the pan? Several techniques help avoid sticking: ensure there’s enough fat left after browning the meat, maintain low heat during the simmering period, use a heavy-bottomed pan that distributes heat evenly, and resist the urge to stir during the covered cooking period. If you notice sticking beginning, a quick check midway through cooking and gentle lifting of rice from the bottom (without fully stirring) can help. For particularly sticky pans, a light spray of cooking oil before adding the meat provides additional insurance.
What’s the best cheese to use for the meltiest result? A combination provides the best outcome: sharp cheddar for flavor and color paired with a superior melting cheese like monterey jack, queso quesadilla, or even American cheese. Pre-shredded cheese contains anti-caking agents that can inhibit smooth melting, so grating your own from blocks results in the creamiest texture. For the absolute best melt, add the cheese in two layers – mix 1/2 cup directly into the hot rice mixture, then sprinkle the remaining cup on top before covering to melt.
Can I make this recipe lower in carbohydrates? Yes, several adaptations work well for lower-carb needs. Replace half or all of the rice with cauliflower rice (add it in the last 5 minutes of cooking rather than at the beginning). Increase the proportion of meat to rice, using 1.5 pounds of meat to 1/2 cup of rice. Add more non-starchy vegetables like bell peppers, zucchini, or spinach to maintain volume and satisfaction. For a keto-friendly version, eliminate the rice and beans entirely, double the meat, and triple the vegetables, creating more of a cheesy taco skillet than a rice dish but maintaining the essential flavors.
Serving Suggestions
This hearty skillet stands perfectly well on its own as a complete meal, but several complementary additions can enhance the experience. Top individual servings with fresh elements that contrast with the cooked ingredients: diced avocado for creamy richness, chopped cilantro for herbaceous brightness, sliced green onions for mild pungency, diced fresh tomatoes for juicy acidity, and a dollop of sour cream to cool the spice. For additional crunch, crush tortilla chips over the top just before eating or serve them alongside for scooping. A simple side salad with a vinaigrette dressing provides refreshing contrast to the rich main dish. For a more substantial spread, serve with warm flour tortillas that can be used to create impromptu burritos from the skillet contents.
Nutritional Benefits
Beyond being delicious and convenient, this one-pan meal offers solid nutritional advantages. The combination of rice and beans creates a complete protein, making this dish satisfying even with reduced meat content. Black beans provide fiber, supporting digestive health and prolonged satiety. Bell peppers contribute vitamin C, while tomatoes offer lycopene, particularly beneficial when cooked with fat. By controlling your own ingredients, you can manage sodium levels more effectively than with restaurant alternatives. For enhanced nutrition, use brown rice for additional fiber and micronutrients, though this requires the cooking adjustments noted earlier. The portion-controlled cheese provides calcium and protein without excessive fat, especially when using reduced-fat varieties that still melt well, like part-skim mozzarella.