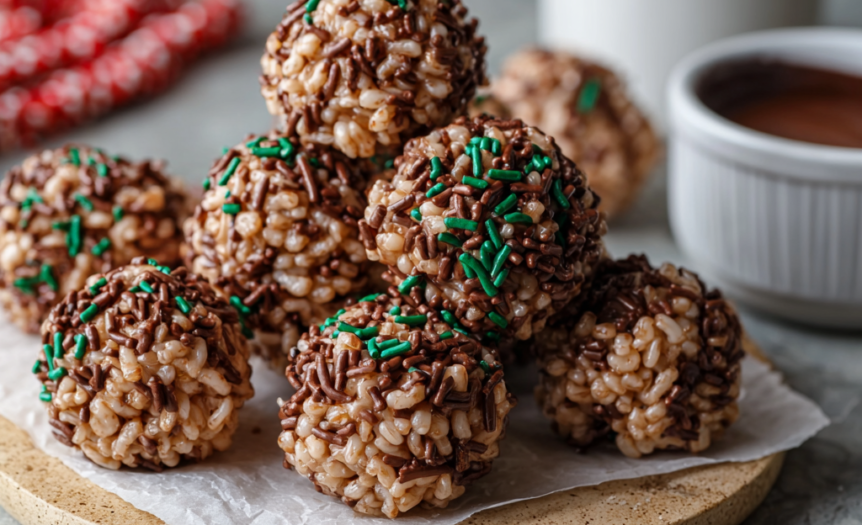
When you need a sweet treat that’s easy to make and always a hit, Chocolate Rice Krispie Balls are the perfect answer. With just a few ingredients and minimal prep time, you can whip up these bite-sized desserts for any occasion—from after-school snacks to holiday trays. They have the nostalgic crunch of classic Rice Krispie treats, but with a rich chocolate twist and a smooth, creamy center.
If you’re short on time but still want something homemade, these no-bake chocolate treats deliver big on flavor with very little effort. Whether you’re making them with kids or preparing a batch to share, this is one recipe that won’t disappoint.
Why These Chocolate Rice Krispie Balls Work
- Quick and Easy: No baking required. Just mix, roll, and chill.
- Minimal Ingredients: Most items are pantry staples like Rice Krispies, peanut butter, and chocolate.
- Perfect Texture: A crisp, airy bite on the outside with a creamy and chewy center.
- Make Ahead Friendly: These store well in the fridge or freezer, making them ideal for prep in advance.
- Customizable: Add sprinkles, sea salt, or drizzle with white chocolate for variety.
Let’s break down everything you need to know to make these right the first time.
Ingredients You’ll Need
- Rice Krispies cereal: Light and crisp, this forms the base and crunch.
- Peanut butter: Creamy peanut butter binds everything together and adds richness.
- Butter: Helps the mixture stay soft and smooth.
- Powdered sugar: Sweetens the mixture and adds structure for rolling into balls.
- Semi-sweet chocolate chips: Melted for dipping or coating.
- Optional toppings: Sprinkles, chopped nuts, or sea salt flakes for finishing.
Ingredient Notes
- Peanut butter: Use regular creamy peanut butter for best results. Natural peanut butter can separate and may not bind as well.
- Chocolate: Semi-sweet gives the perfect balance of rich and sweet, but you can use dark or milk chocolate if preferred.
- Butter: Salted or unsalted butter both work. If using salted, skip adding extra salt.
Equipment You’ll Need
- Mixing bowls
- Baking sheet
- Parchment or wax paper
- Microwave-safe bowl or double boiler (for melting chocolate)
- Spoon or small cookie scoop
Step-by-Step Instructions
1. Mix the Base
In a large mixing bowl, combine the peanut butter, softened butter, and powdered sugar. Mix until smooth and uniform.
Add the Rice Krispies cereal and gently fold it into the peanut butter mixture. Stir until evenly coated and fully combined. The mixture should be sticky but manageable.
2. Shape the Balls
Line a baking sheet with parchment paper. Using a spoon or cookie scoop, portion out small amounts of the mixture and roll them into 1-inch balls. Place them on the prepared baking sheet.
Once all the balls are shaped, place the tray in the refrigerator for about 20 minutes to firm up.
3. Melt the Chocolate
While the Rice Krispie balls chill, melt your chocolate chips. You can use a microwave in short intervals (30 seconds at a time, stirring in between) or a double boiler on the stove. Stir until smooth and fully melted.
4. Coat the Balls
Remove the chilled balls from the fridge. Using a fork or dipping tool, dip each ball into the melted chocolate, letting any excess drip off. Place them back on the parchment-lined tray.
If you want to decorate, sprinkle with toppings while the chocolate is still wet.
5. Chill and Serve
Once all the balls are coated, refrigerate again for 20–30 minutes until the chocolate is fully set.
Serve chilled or at room temperature. Store leftovers in an airtight container in the fridge for up to one week.
Tips for Best Results
- Work Quickly with Melted Chocolate: Chocolate sets fast, so dip and decorate promptly.
- Uniform Size: Use a small scoop for evenly sized balls—this helps them chill and coat evenly.
- Avoid Overmixing: Stir gently when combining the cereal to keep its crisp texture.
- Let Set Properly: Don’t skip chilling—the chocolate needs time to harden for a smooth finish.

Variations to Try
- White Chocolate Coating: Swap semi-sweet for white chocolate for a sweeter variation.
- Nut-Free Option: Use sunflower seed butter if avoiding peanuts.
- Festive Sprinkles: Add holiday-themed sprinkles for seasonal treats.
- Sea Salt Finish: Sprinkle with sea salt flakes for a sweet and salty combo.
- Drizzled Chocolate: Drizzle with contrasting chocolate for a bakery-style look.
Serving Ideas
These chocolate Rice Krispie balls are great for:
- Parties and Potlucks: Easy to make in large batches and always disappear quickly.
- Holiday Trays: Add to a cookie or candy tray for variety.
- Lunchbox Treats: A sweet bite that holds up well for on-the-go snacking.
- Dessert Buffets: A no-fuss addition to any dessert table.
Make Ahead and Storage
- Fridge: Store in an airtight container for up to 7 days.
- Freezer: Freeze for up to 2 months. Thaw at room temperature or in the fridge.
- Make Ahead: You can prepare and shape the balls a day ahead, then dip in chocolate before serving.
Frequently Asked Questions
Can I use marshmallows in this recipe?
This version skips marshmallows for a creamier, peanut butter base. If you’d like to add them, try melting mini marshmallows with the butter before mixing in cereal.
Do I have to chill before dipping in chocolate?
Yes, chilling helps the balls hold their shape when dipped in warm chocolate.
Can I use crunchy peanut butter?
You can, but the texture will be more rustic. Smooth peanut butter gives a more consistent bite.
What if I don’t have powdered sugar?
Granulated sugar won’t dissolve as smoothly. You can make powdered sugar at home by blending granulated sugar in a food processor until fine.
Is it possible to double the recipe?
Absolutely. This recipe scales well for larger batches—just ensure your mixing bowl is large enough.
Final Thoughts
These Chocolate Rice Krispie Balls are proof that great treats don’t have to be complicated. With just a few ingredients and minimal prep, you can enjoy a rich, crunchy, chocolatey dessert that’s perfect for any occasion. They’re great for sharing, easy to store, and always a hit with both kids and adults.
Try making a batch today—once you see how quick and easy they are, they’ll become a regular in your dessert rotation.

