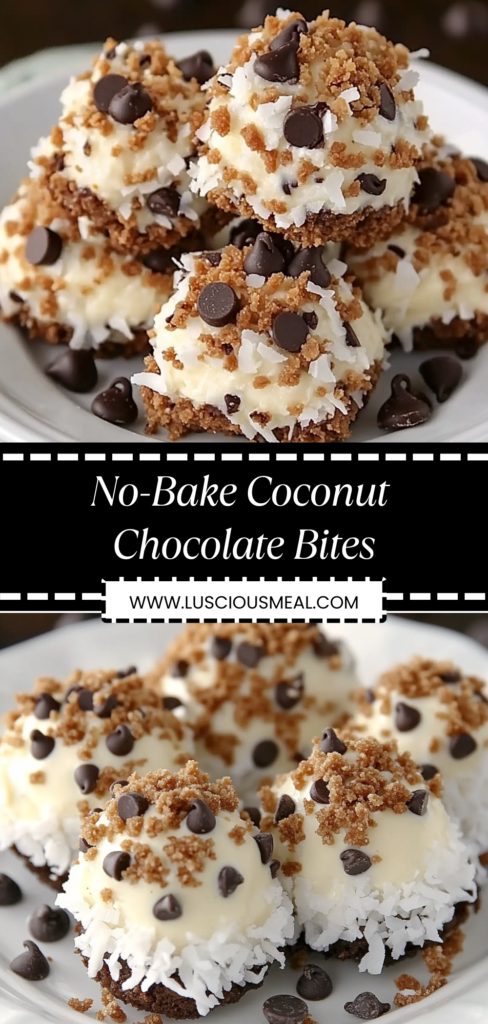
These no-bake coconut chocolate bites deliver the perfect combination of chewy coconut texture and rich chocolate coating in irresistible two-bite treats that require no oven time or complicated techniques. The naturally sweet coconut filling provides tropical flavor while the chocolate shell adds indulgent richness, creating a candy-like confection that satisfies both coconut lovers and chocolate enthusiasts. If you enjoy this style of simple, no-bake treat, you might also like chocolate peanut butter balls, rum balls, or other rolled confections that come together quickly.
Why You’ll Love This Recipe
- Foolproof simplicity – requires no baking, tempering, or special equipment, making perfect treats accessible to bakers of all skill levels
- Quick satisfaction – comes together in under 30 minutes plus chilling time, perfect for last-minute dessert needs or spontaneous sweet cravings
- Naturally gluten-free – uses simple, whole ingredients without wheat flour, making them suitable for gluten-sensitive guests without sacrificing flavor
- Gift-worthy presentation – creates professional-looking confections perfect for holiday giving, bake sales, or special occasion treats
Ingredients Breakdown
Sweetened shredded coconut: The foundation that provides both texture and flavor, creating the characteristic chewiness that defines these treats. Choose finely shredded coconut rather than flaked varieties for the best binding and smoothest texture. The sweetened version is essential as it provides the sugar needed to bind the mixture together while contributing the classic coconut candy flavor. Angel Flake or similar brands work perfectly, though avoid unsweetened coconut which won’t hold together properly without additional sweeteners. The coconut should be fresh and fluffy, not compressed or stale.
Sweetened condensed milk: Acts as both sweetener and binding agent, creating the sticky consistency that holds the coconut together while adding rich, caramel-like sweetness. This ingredient is crucial for the proper texture – evaporated milk or regular milk won’t provide the thick, sticky consistency needed. Use only sweetened condensed milk, not evaporated milk, as they’re completely different products. The thick, syrupy consistency helps form cohesive balls that maintain their shape during chilling and coating.
Vanilla extract: Enhances the overall flavor profile while adding warmth and depth that complements both coconut and chocolate. Pure vanilla extract provides the best flavor, though imitation vanilla works adequately. The amount should be subtle – enough to enhance the coconut flavor without overwhelming it. High-quality vanilla extract makes a noticeable difference in the final taste, adding complexity that elevates these simple treats.
Chocolate for coating: Creates the indulgent outer shell that transforms simple coconut balls into elegant confections. Semi-sweet chocolate chips work perfectly and melt smoothly, though dark chocolate provides more sophisticated flavor for adult palates. Choose quality chocolate without waxy additives for the best melting properties and flavor. The chocolate should contain real cocoa butter rather than vegetable oils for proper melting and setting characteristics.
Coconut oil: Helps create a smooth, glossy chocolate coating that sets properly and doesn’t crack when bitten. The small amount of oil prevents the chocolate from being too thick or difficult to work with while creating the professional appearance and texture. Use refined coconut oil for neutral flavor, or unrefined for subtle coconut enhancement. The oil also helps the chocolate coating stay flexible rather than brittle when chilled.
Step-by-Step Instructions
- Line a baking sheet with parchment paper for easy removal of the finished treats. The parchment prevents sticking and makes cleanup effortless. Choose a baking sheet that fits comfortably in your refrigerator for the chilling steps. Having your workspace organized before beginning makes the assembly process much smoother and more efficient.
- In a medium mixing bowl, combine 3 cups sweetened shredded coconut, 1/2 cup sweetened condensed milk, and 1 teaspoon vanilla extract. Mix thoroughly with a wooden spoon or your hands until the mixture is evenly moistened and holds together when squeezed. The consistency should be moldable but not wet or sticky. If the mixture seems too dry, add condensed milk 1 tablespoon at a time until it holds together properly.
- Using clean hands or a small cookie scoop, form the coconut mixture into balls approximately 1 inch in diameter. Roll each portion between your palms to create smooth, round shapes. The balls should be compact enough to hold together but not so tight that they become dense. Place the formed balls on the prepared parchment-lined baking sheet, spacing them so they don’t touch.
- Refrigerate the coconut balls for at least 30 minutes until firm and well-chilled. This chilling step is crucial for the balls to hold their shape during the chocolate coating process. Cold coconut balls are much easier to coat and won’t fall apart when dipped in warm chocolate. The firmer they are, the easier the coating process will be.
- About 10 minutes before the chilling time is complete, prepare the chocolate coating. In a microwave-safe bowl, combine 12 ounces of chocolate chips with 2 tablespoons coconut oil. Microwave in 30-second intervals, stirring between each interval, until completely smooth and melted. Alternatively, melt using a double boiler for more controlled heating.
- Let the melted chocolate cool slightly until it’s warm but not hot – it should be comfortable to touch. Chocolate that’s too hot will melt the coconut balls, while chocolate that’s too cool will be thick and difficult to work with. The ideal temperature creates a smooth, even coating that sets properly.
- Working with one chilled coconut ball at a time, drop it into the melted chocolate and use a fork or chocolate dipping tool to roll it around until completely coated. Lift the ball with the fork, allowing excess chocolate to drip back into the bowl. Gently tap the fork against the bowl’s edge to remove excess coating.
- Place the chocolate-coated ball back on the parchment-lined baking sheet. Repeat this process with all the coconut balls, working quickly but carefully to maintain even coating. If the chocolate begins to thicken during the coating process, rewarm it briefly in the microwave, stirring until smooth again.
- Once all balls are coated, refrigerate for an additional 15-20 minutes until the chocolate is completely set and firm to the touch. The chocolate should have a matte finish and shouldn’t leave marks when gently touched. This final chilling ensures the coating is stable and won’t melt at room temperature.
- Remove from the refrigerator and let stand at room temperature for 5 minutes before serving if desired. The treats can be served chilled for a firmer texture or at room temperature for a softer bite. Store any leftovers in an airtight container in the refrigerator to maintain the chocolate coating’s integrity.
Perfect Texture: What to Look For
Successfully executed no-bake coconut chocolate bites should have a smooth, glossy chocolate exterior that gives way to a tender, chewy coconut interior with just the right amount of sweetness. The chocolate coating should be thin enough to bite through easily but thick enough to provide substantial chocolate flavor and visual appeal. The coconut filling should hold together cohesively without being dry or crumbly, with individual coconut strands visible but well-bound by the condensed milk. When bitten, the texture should offer a satisfying contrast between the smooth chocolate shell and the textured coconut center, with flavors that complement rather than compete with each other.
Customization Options
This versatile base recipe welcomes numerous delicious variations to suit different tastes and occasions. For tropical flair, add 1/4 cup finely chopped dried pineapple or mango to the coconut mixture. Create rum balls by adding 1-2 tablespoons of rum extract to the coconut base. For extra richness, roll the balls in chopped toasted almonds before coating with chocolate, or add 1/4 cup mini chocolate chips to the coconut mixture. During holidays, tint the coconut mixture with food coloring for festive colors, or roll finished treats in colored sprinkles before the chocolate sets completely.
Practical Tips
Forming consistent balls: Use a small cookie scoop or melon baller for uniform sizing that ensures even coating and professional appearance. Wet hands slightly if the mixture sticks, but avoid too much moisture which can affect the texture.
Chocolate coating success: The temperature of the melted chocolate is crucial for smooth coating. Test on one ball first – if it’s too hot, let it cool; if too thick, warm slightly. Work in small batches to prevent the chocolate from cooling too much during the coating process.
Storage: Keep finished treats refrigerated in an airtight container for up to 1 week. Layer between parchment paper to prevent sticking. The chocolate may develop a slight bloom if temperature fluctuates, but this doesn’t affect taste or safety.
Make-ahead strategy: The coconut balls can be formed and frozen for up to 1 month before coating. Coat them directly from frozen, which actually makes the process easier as they hold their shape even better.
Common Questions
Why won’t my coconut mixture hold together? This usually means there isn’t enough sweetened condensed milk to bind the coconut. Add more condensed milk 1 tablespoon at a time until the mixture holds together when squeezed. The coconut should be evenly moistened throughout.
How do I prevent the chocolate from being too thick or thin? The coconut oil helps create the proper consistency, but temperature is key. If too thick, warm the chocolate slightly; if too thin, let it cool a bit before dipping. The chocolate should coat smoothly without being runny.
Can I use unsweetened coconut instead? You’ll need to add powdered sugar to the mixture – start with 1/4 cup and adjust to taste. The sweetened condensed milk alone won’t provide enough sweetness with unsweetened coconut. The texture may also be slightly different.
Why is my chocolate coating cracking? This usually happens when the coconut balls are too cold when dipped, or the chocolate cools too quickly. Let the balls sit at room temperature for 5 minutes before dipping, and ensure your chocolate isn’t too hot, which can cause thermal shock.
Serving Suggestions
These elegant little treats work beautifully for various occasions and serving styles. For casual enjoyment, arrange them on a simple plate with coffee or tea for afternoon indulgence. During parties, display them on tiered serving stands or decorative platters alongside other petit fours and small desserts for an impressive dessert spread.
For gift-giving, place them in small paper cups and arrange in decorative boxes or tins – they make excellent homemade presents for holidays, teacher appreciation, or hostess gifts. The professional appearance belies their simple preparation, making them perfect for bake sales or potluck contributions where you want to impress without spending hours in the kitchen. Consider packaging them in clear cellophane bags tied with ribbon for individual gift portions.
Nutritional Benefits
While definitely a treat, these coconut chocolate bites do provide some nutritional value from their simple, whole-food ingredients. Coconut contains healthy fats, including medium-chain triglycerides that may support metabolism, along with fiber and minerals like manganese and copper. The dark chocolate, if used, provides antioxidants and may support heart health in moderation.
The no-bake preparation preserves more of the natural nutrients compared to baked goods that may lose vitamins during high-heat cooking. By making them at home, you control the ingredient quality and avoid the preservatives and artificial additives found in many commercial candies. The rich, satisfying nature of these treats means a small portion provides significant satisfaction, potentially preventing overindulgence while still delivering the pleasure and comfort that makes homemade confections so special for celebrations and everyday enjoyment.