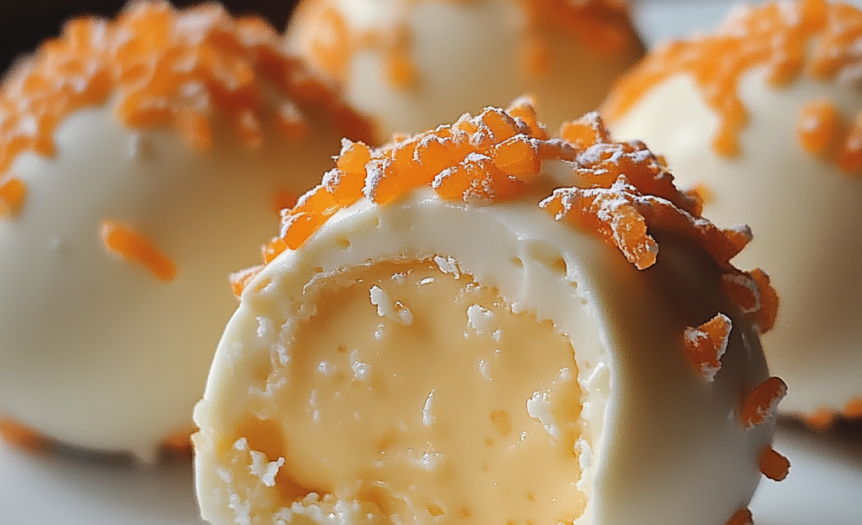
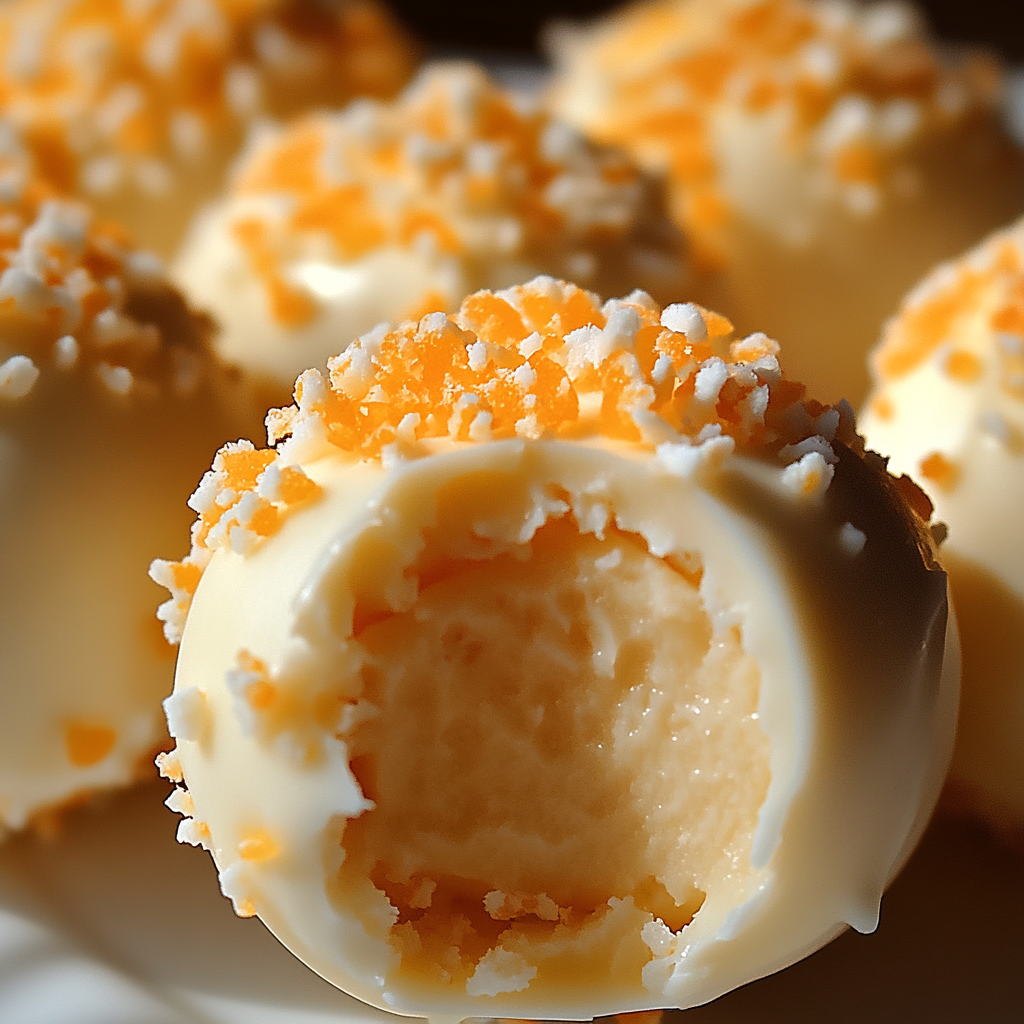
Remember the joy of chasing down the ice cream truck for that perfect orange creamsicle on a hot summer day? These No-Bake Orange Creamsicle Truffles capture that nostalgic flavor in a sophisticated, bite-sized treat that’s perfect for any occasion. With their bright citrus flavor, creamy white chocolate, and melt-in-your-mouth texture, these truffles deliver the classic creamsicle experience in an elegant package. Best of all, they require no baking, minimal ingredients, and can be prepared in advance—making them ideal for everything from holiday gift-giving to summer gatherings. Whether you’re a seasoned candy maker or a novice in the kitchen, these easy-to-make treats will delight everyone who tries them.
Why These Orange Creamsicle Truffles Will Become Your New Favorite Treat
There’s something uniquely satisfying about the combination of creamy vanilla and bright orange that has made the classic creamsicle a beloved treat for generations. These truffles take that iconic flavor pairing and transform it into a sophisticated confection that’s both nostalgic and fresh. Unlike many truffle recipes that require tempering chocolate or precise temperature control, these no-bake beauties are remarkably forgiving and accessible to cooks of all skill levels.
What makes these truffles truly special is their versatility. They’re elegant enough for a dinner party dessert platter, charming enough for holiday gift boxes, and fun enough for a family dessert. The vibrant orange color brings visual appeal to any table, while the familiar yet unexpected flavor combination makes them a memorable treat that stands out from standard chocolate offerings.
The no-bake nature of these truffles also means they’re perfect for warm weather when turning on the oven feels like a punishment. They store beautifully in the refrigerator, allowing you to make them days in advance of an event—a true time-saver for busy hosts and hostesses.
Simple Ingredients for Maximum Flavor Impact
The beauty of these truffles lies in their simplicity. With just a handful of quality ingredients, you can create a confection that tastes like it came from a high-end chocolatier:
For the Truffle Base:
- 8 ounces (1 package) cream cheese, softened to room temperature
- 1 pound (about 3½ cups) white chocolate chips, divided
- ¼ cup powdered sugar, sifted
- 2 tablespoons orange zest (from approximately 2 medium oranges)
- 2 teaspoons pure orange extract
- 1 teaspoon pure vanilla extract
- ¼ teaspoon fine sea salt
- 1-2 drops orange food coloring (optional, for more vibrant color)
For Coating and Decoration:
- 8 ounces (about 1⅓ cups) white chocolate chips
- 1 tablespoon coconut oil or shortening (helps create a smoother coating)
- Orange sanding sugar or sprinkles for decoration
- Additional orange zest for garnish
- White chocolate drizzle (optional)
Step-by-Step Instructions for Perfect Creamsicle Truffles
Follow these simple steps to create these no-bake wonders with professional-looking results:
Step 1: Prepare the Creamy Orange Base
In a large microwave-safe bowl, melt 8 ounces (about 1⅓ cups) of the white chocolate chips in 30-second intervals, stirring between each interval, until smooth and completely melted. Be careful not to overheat, as white chocolate can seize easily. Allow the melted chocolate to cool slightly, about 5 minutes.
In a separate large bowl, beat the softened cream cheese with an electric mixer until smooth and fluffy, about 2 minutes. Add the powdered sugar, orange zest, orange extract, vanilla extract, and salt. Beat until well combined and no lumps remain.
Pour the slightly cooled melted white chocolate into the cream cheese mixture and beat until fully incorporated. If using food coloring, add 1-2 drops now for a more vibrant orange color, and mix until evenly distributed. The mixture should be a soft, pale orange.
Step 2: Add Texture and Body
Fold in the remaining white chocolate chips (about 2 cups) to add texture and structure to the truffles. The unmelted chips create little pockets of firmness in the creamy base, providing that perfect bite experience.
Cover the bowl with plastic wrap and refrigerate for at least 2 hours, or until the mixture is firm enough to scoop and roll. For best results, chill overnight to allow the flavors to fully develop.
Step 3: Shape the Truffles
Line a baking sheet with parchment paper. Remove the chilled truffle mixture from the refrigerator.
Using a 1-tablespoon cookie scoop or melon baller, scoop out portions of the mixture and quickly roll between your palms to form smooth balls. The warmth of your hands will slightly soften the mixture, so work quickly.
Place the rolled truffles on the prepared baking sheet and return to the refrigerator for at least 30 minutes to firm up before dipping. If the mixture becomes too soft to work with, return it to the refrigerator for 15-20 minutes before continuing.
Step 4: Prepare the White Chocolate Coating
In a microwave-safe bowl, combine the coating white chocolate chips and coconut oil. Microwave in 30-second intervals, stirring between each, until completely melted and smooth. The coconut oil helps create a thinner, more workable coating that sets beautifully.
Allow the melted chocolate to cool slightly but remain fluid. If it’s too hot, it can melt the truffle centers; if too cool, it will be too thick for smooth dipping.
Step 5: Dip and Decorate
Remove the chilled truffle balls from the refrigerator. Working with one truffle at a time, place it on a fork or dipping tool and lower it into the melted white chocolate. Gently tap the fork against the side of the bowl to remove excess coating and create a smooth surface.
Before the coating sets, sprinkle with orange sanding sugar, orange zest, or decorative sprinkles. Work quickly, as the chilled centers will help the coating set rapidly.
Place the dipped truffles back on the parchment-lined baking sheet, allowing space between each for the coating to set without sticking together.
Step 6: Add Final Touches
For an extra decorative touch, drizzle any remaining melted white chocolate over the set truffles using a small piping bag or a fork dipped in the chocolate.
Return the decorated truffles to the refrigerator for at least 30 minutes to fully set the coating. Once set, transfer to an airtight container with parchment paper between layers to prevent sticking.
Variations to Keep It Exciting
While the classic Orange Creamsicle flavor is hard to beat, these adaptable truffles can be customized in numerous ways:
Citrus Medley:
Replace half the orange zest and extract with lemon or lime for a multi-citrus experience that’s bright and complex.
Chocolate-Orange Combo:
Dip half of the truffles in dark chocolate instead of white for a chocolate-orange variation that appeals to dark chocolate lovers.
Tropical Twist:
Add 1/4 cup finely chopped dried pineapple to the base mixture and replace the orange extract with coconut extract for a tropical-inspired truffle.
Cranberry-Orange Holiday Edition:
Fold in 1/3 cup finely chopped dried cranberries to add a festive touch perfect for winter holidays. Roll in crushed pistachios for a red and green color scheme.
Creamsicle Coconut Snowballs:
Roll the dipped truffles in shredded coconut instead of sanding sugar for a snowy effect that adds textural contrast.
Storage and Make-Ahead Tips
These truffles are perfect for advance preparation:
Refrigerator Storage:
- Store finished truffles in an airtight container in the refrigerator for up to 2 weeks.
- Place parchment paper between layers to prevent sticking and maintain the coating’s appearance.
- Allow truffles to come to room temperature for about 10 minutes before serving for the best flavor and texture.
Freezer Storage:
- Uncoated truffle centers can be frozen for up to 3 months. Thaw overnight in the refrigerator before dipping.
- Completed truffles can be frozen for up to 1 month. Thaw in the refrigerator before serving.
Gift-Giving Preparation:
- For holiday gifts, prepare truffles up to 1 week in advance and keep refrigerated until packaging.
- Place in decorative paper cups inside gift boxes or tins, with parchment between layers.
- Attach a note advising recipients to refrigerate the truffles upon receiving.
Perfect Occasions for Orange Creamsicle Truffles
These versatile treats shine at numerous events and occasions:
Seasonal Celebrations:
- Summer gatherings when the creamsicle flavor feels particularly nostalgic
- Spring brunches where the bright citrus complements the season
- Winter holidays when homemade gifts are especially appreciated
- Easter dessert tables where the orange color fits the palette
Special Events:
- Baby or bridal showers (especially lovely for a “citrus” themed event)
- Graduation parties
- Mother’s Day treats
- Wedding favor boxes
Everyday Indulgence:
- After-dinner sweet bite with coffee
- Lunchbox treat for a special surprise
- Weekend family dessert board
- Work potluck contribution that stands out from the usual offerings
Expert Tips for Truffle-Making Success
These professional tips will help ensure your truffles turn out perfectly every time:
- Temperature matters: Keep everything cold! If at any point the mixture becomes too soft to work with, return it to the refrigerator for 15-20 minutes.
- Use a light touch: When rolling the truffle centers, work quickly and don’t compress the mixture too much—a gentle touch creates a melt-in-your-mouth texture.
- Quality ingredients make a difference: Use pure extracts rather than imitation for authentic flavor, and choose a good quality white chocolate for the best texture and taste.
- Zest carefully: When zesting the oranges, avoid the bitter white pith beneath the colored portion of the peel.
- For perfect coating: Make sure the truffle centers are very cold and the melted chocolate has cooled slightly before dipping. This prevents melting and creates a smoother finish.
- Troubleshooting seizing: If your white chocolate seizes (becomes grainy or solid), add 1 teaspoon of vegetable oil and stir vigorously—it might recover enough to use for the base mixture.
- Clean hands, clean results: Wash and thoroughly dry your hands before rolling truffles, as any moisture can affect the texture of the mixture.
The Science Behind Perfect No-Bake Truffles
Understanding the food science at work helps achieve consistent results:
- Fat structure: The combination of cream cheese and white chocolate creates a ganache-like structure that firms up when chilled but has a smooth mouthfeel at serving temperature.
- Flavor infusion: The overnight refrigeration allows the orange oils from the zest to fully infuse into the fats in the mixture, creating a more pronounced and complex orange flavor.
- Texture development: The unmelted white chocolate chips provide structural support and textural contrast in the soft truffle centers.
- Coating crystallization: The small amount of coconut oil in the coating helps the white chocolate set with smaller crystals, creating a smoother finish and cleaner snap when bitten.
Pairing Suggestions for a Complete Dessert Experience
Enhance your truffle enjoyment with these complementary flavors:
Beverage Pairings:
- Earl Grey tea (the bergamot notes complement the orange beautifully)
- Champagne or Prosecco
- Coffee with a touch of cream
- Dessert wine like Moscato d’Asti
Serving Suggestions:
- As part of a petit four plate with dark chocolate truffles and fruit-based confections
- Alongside shortbread cookies for textural contrast
- With a small scoop of vanilla bean ice cream for a deconstructed creamsicle experience
- On a dessert charcuterie board with nuts, dried fruits, and chocolate dipped fruits
The Joy of Handmade Candy-Making
There’s something deeply satisfying about creating your own confections. Unlike commercial candies with preservatives and artificial flavors, these homemade truffles offer:
- Customizable sweetness: Adjust the sugar level to your preference
- Real ingredient control: No artificial flavors or additives
- Freshness factor: Maximum flavor from real citrus oils and quality chocolate
- Personal touch: The slightly imperfect appearance of handmade truffles adds charm and authenticity
- Gift-giving impact: Few offerings make people feel as special as homemade candies
Making these truffles connects us to culinary traditions while creating new memories. The process itself—the bright scent of fresh orange zest, the therapeutic rhythm of rolling the centers, the creative act of decoration—becomes a pleasure in its own right.
A Taste of Sunshine in Every Bite
These No-Bake Orange Creamsicle Truffles are more than just a sweet treat—they’re a tiny moment of joy captured in a bite-sized confection. The balance of creamy white chocolate and vibrant citrus creates a flavor experience that’s simultaneously comforting in its familiarity and exciting in its execution.
Whether you’re making them for yourself, your family, or as gifts, these truffles bring a taste of sunshine to any occasion. Their cheerful orange hue brightens dessert platters, while their creamy-meets-citrusy flavor profile offers a sophisticated alternative to traditional chocolate truffles.
The best part? Their simplicity means you don’t need to be a trained pastry chef to create something truly special. With just a handful of ingredients and some patient chilling time, you can craft confections that look and taste like they came from a high-end chocolate shop.
So gather your ingredients, set aside a little time, and prepare to delight in both the process of making these truffles and the joy of sharing them. After all, the most memorable treats are the ones made with care and shared with love.