These Oreo stuffed cinnamon rolls combine the beloved flavors of chocolate sandwich cookies with the warm, comforting appeal of homemade cinnamon rolls to create an indulgent breakfast treat that’s pure decadence. The crushed Oreos add delightful texture and intense chocolate flavor while the traditional cinnamon-sugar swirl provides familiar warmth, all wrapped in tender, fluffy dough. If you enjoy this style of over-the-top breakfast pastry, you might also like chocolate chip cinnamon rolls, s’mores rolls, or other stuffed sweet breads that push the boundaries of traditional comfort food.
Why You’ll Love This Recipe
- Ultimate indulgence – combines two beloved treats into one spectacular pastry that delivers maximum comfort food satisfaction in every bite
- Impressive presentation – creates bakery-quality results that look professionally made while using accessible techniques that home bakers can master
- Perfect texture contrast – the crunchy Oreo pieces provide delightful textural interest against the soft, fluffy dough and gooey cinnamon filling
- Special occasion worthy – transforms ordinary weekend mornings into memorable occasions perfect for birthdays, holidays, or any time you want to create something extraordinary
Ingredients Breakdown
Enriched dough ingredients: The foundation that creates tender, fluffy rolls capable of supporting the rich filling without becoming dense. Bread flour provides more protein than all-purpose flour, creating better structure and chewiness. Active dry yeast must be fresh and properly activated for optimal rise. Whole milk adds richness and helps create the tender crumb, while butter contributes flavor and moisture. Sugar feeds the yeast and adds sweetness that complements the fillings. The dough should be soft and slightly sticky when properly mixed, developing into smooth, elastic texture through kneading.
Oreo cookies: The star addition that transforms ordinary cinnamon rolls into something extraordinary. Use regular Oreos rather than double-stuffed varieties, which can make the filling too sweet and heavy. Crush the cookies into chunky pieces rather than fine crumbs to maintain textural interest – you want pieces large enough to provide bursts of chocolate flavor and crunchy texture. About 20-24 cookies typically provides the right amount for proper distribution without overwhelming the other flavors.
Cinnamon-sugar filling: The classic combination that provides warmth and familiar comfort alongside the bold Oreo flavors. Use high-quality ground cinnamon for the best flavor – Ceylon cinnamon offers more complex, sweeter notes than standard cassia cinnamon. Brown sugar provides molasses undertones that complement both the cinnamon and chocolate beautifully. The butter should be softened to room temperature for easy spreading that won’t tear the delicate dough.
Cream cheese glaze: Creates the luxurious finishing touch that brings all flavors together while adding visual appeal. Full-fat cream cheese provides the best texture and flavor – it should be completely softened for smooth mixing. Powdered sugar dissolves easily and creates the proper consistency, while vanilla extract enhances the overall flavor profile. The glaze should be thick enough to coat the rolls without running off, but thin enough to drizzle attractively.
Whole milk: Used throughout the recipe for consistent flavor and texture. Whole milk provides the fat content necessary for tender dough and rich flavor. The milk should be warmed to the correct temperature for yeast activation – too hot will kill the yeast, while too cold won’t activate it properly. Room temperature milk works best for the other applications in this recipe.
Step-by-Step Instructions
- Begin by activating the yeast: warm 1/2 cup whole milk to 110°F (43°C) and stir in 1 tablespoon granulated sugar and 2 1/4 teaspoons active dry yeast. Let stand for 5-10 minutes until foamy and doubled in size. This proves the yeast is alive and active. If the mixture doesn’t foam, the yeast is dead and should be replaced.
- In a large mixing bowl, combine 3 1/2 cups bread flour, 1/4 cup granulated sugar, and 1 teaspoon salt. Create a well in the center and add the activated yeast mixture, 1/4 cup melted butter (cooled slightly), and 1 large beaten egg. Mix until a shaggy dough forms, then turn onto a lightly floured surface.
- Knead the dough for 8-10 minutes until smooth, elastic, and slightly tacky but not sticky. The dough should spring back when poked and feel soft and supple. Add flour gradually if the dough is too sticky, but avoid adding too much, which can make the rolls dense. Proper kneading develops the gluten structure essential for fluffy rolls.
- Place the kneaded dough in a greased bowl, turning to coat all surfaces. Cover with a damp towel and let rise in a warm place for 1-2 hours until doubled in size. The dough should pass the “poke test” – when gently poked, the indentation should remain without springing back immediately.
- While the dough rises, prepare the filling by crushing 20-24 Oreo cookies into chunky pieces using a food processor or by placing them in a sealed bag and crushing with a rolling pin. Aim for pieces roughly the size of small pebbles – large enough to provide texture but small enough to distribute evenly. Set aside with 1/2 cup brown sugar and 2 tablespoons ground cinnamon.
- Once risen, punch down the dough gently to release air bubbles. Turn onto a lightly floured surface and roll into a 12×18-inch rectangle, keeping the thickness as even as possible. The dough should roll easily without springing back – if it resists, let it rest for 10 minutes before continuing.
- Spread 4 tablespoons of softened butter evenly over the dough surface, leaving a 1/2-inch border along one long edge for sealing. Sprinkle the brown sugar-cinnamon mixture evenly over the buttered surface, then distribute the crushed Oreos evenly on top, pressing gently to help them adhere.
- Starting from the long edge opposite the border, roll the dough tightly into a log, keeping the roll even and compact. Pinch the seam closed and position seam-side down. Use a sharp knife or dental floss to cut the log into 12 equal pieces, cleaning the knife between cuts for the neatest results.
- Arrange the cut rolls in a greased 9×13-inch baking pan, placing them cut-side up with slight gaps between each roll to allow for rising. Cover with a damp towel and let rise for 30-45 minutes until puffy and touching each other. The second rise is crucial for achieving the fluffy texture that makes these rolls special.
- Preheat the oven to 350°F (175°C) during the last 15 minutes of rising time. Bake the rolls for 25-30 minutes until golden brown on top and cooked through in the center. The internal temperature should reach 190°F (88°C). Don’t overbake, which can make them dry despite the rich filling.
- While the rolls bake, prepare the cream cheese glaze by beating 4 ounces softened cream cheese until smooth, then gradually adding 1 1/2 cups powdered sugar, 1/4 cup milk, and 1 teaspoon vanilla extract until smooth and spreadable. The glaze should be thick enough to stay on the rolls but thin enough to drizzle attractively.
- Remove the baked rolls from the oven and let cool for 5-10 minutes before applying the glaze. The slight cooling prevents the glaze from melting completely while ensuring it adheres well and creates an attractive finish. Serve warm for the best experience of contrasting textures and temperatures.

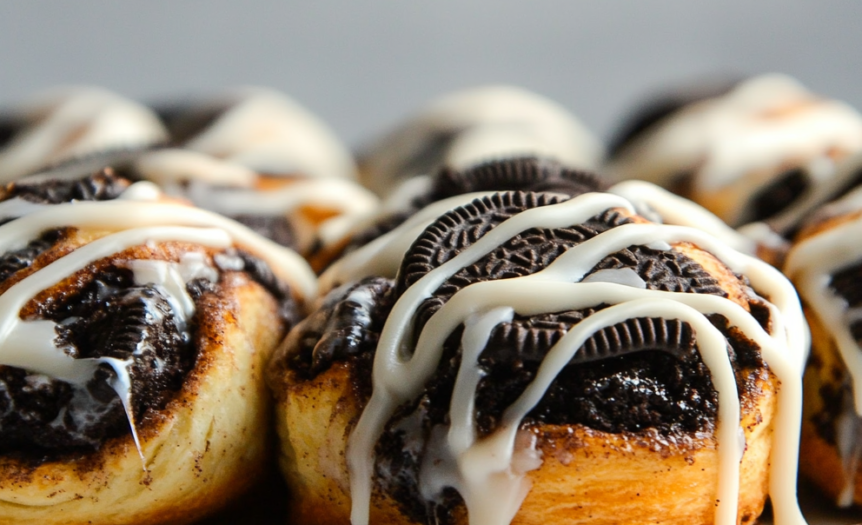
Perfect Texture: What to Look For
Successfully executed Oreo stuffed cinnamon rolls should have tender, fluffy dough that pulls apart easily while remaining substantial enough to support the rich filling. The Oreo pieces should provide distinct crunchy texture throughout, offering bursts of chocolate flavor and textural interest. The cinnamon-sugar filling should be evenly distributed and slightly gooey when warm, while the cream cheese glaze should be smooth and creamy, adding richness without overwhelming the other flavors. When properly baked, the rolls should be golden brown on top with fully cooked centers that aren’t doughy or raw.
Customization Options
This indulgent base recipe welcomes various creative adaptations while maintaining its essential character. For different cookie flavors, substitute Golden Oreos, chocolate chip cookies, or even crushed snickerdoodles. Add a layer of Nutella or peanut butter before adding the Oreo pieces for extra richness. Create seasonal versions by using limited-edition Oreo flavors like mint, pumpkin spice, or red velvet. For adult variations, add a tablespoon of coffee liqueur or bailey’s to the glaze. Different glaze options like chocolate ganache or caramel sauce provide alternative finishing touches.
Practical Tips
Dough consistency: The dough should be soft and slightly tacky but not sticky enough to leave residue on clean hands. Proper hydration is crucial for tender rolls – err on the side of slightly too wet rather than too dry, as flour can always be added during kneading.
Even distribution: Distribute the Oreo pieces evenly across the dough surface and press gently to help them adhere during rolling. Uneven distribution can cause some rolls to be loaded with cookies while others have very few.
Rising environment: Create a warm environment for rising by placing the bowl near a warm oven, on top of the refrigerator, or in an oven with just the light on. Ideal temperature is around 80°F (27°C) – too warm can kill the yeast or cause uneven rising.
Storage: Fresh baked rolls keep at room temperature for 2-3 days when properly covered. They can be frozen for up to 3 months – thaw overnight and warm in a 300°F oven for 10 minutes to refresh. The glaze can be applied after reheating.
Common Questions
Can I prepare these the night before? Yes, assemble the rolls completely, cover tightly, and refrigerate overnight. Remove from the refrigerator 1-2 hours before baking to allow them to come to room temperature and complete their final rise. This make-ahead method actually improves flavor as ingredients have time to meld.
Why didn’t my dough rise properly? Check that your yeast is fresh and was properly activated with foamy, doubled volume. Ensure the rising environment is warm enough (around 80°F) and the dough isn’t in a drafty area. Old yeast, water that’s too hot or cold, or too much salt can all inhibit rising.
Can I use instant yeast instead? Yes, reduce the amount to 2 teaspoons and mix it directly with the dry ingredients without activating it first. The rising times may be slightly shorter with instant yeast, so watch for visual cues rather than relying solely on time.
How do I prevent the filling from leaking out? Don’t overfill the rolls, leave a proper border for sealing, and pinch the seam closed securely. Roll tightly but not so tight that the dough tears. If filling does leak during baking, it will caramelize and can be scraped up and used as an extra topping.
Serving Suggestions
These decadent rolls work best as a special occasion breakfast or brunch centerpiece, served warm with coffee or cold milk to balance the richness. For holiday mornings or birthday breakfasts, present them on a large platter garnished with fresh berries for color contrast and additional Oreo cookies for those who want extra chocolate.
The rich, sweet nature means they’re quite filling, so consider serving smaller portions alongside fresh fruit, yogurt, or a light egg dish for a more balanced meal. For casual entertaining, let guests help themselves directly from the baking pan for a more relaxed, family-style presentation. These rolls also make impressive gifts when individually wrapped and presented in decorative boxes or tins.
Nutritional Benefits
While definitely an indulgent treat, these rolls do provide some nutritional value from their ingredients. The enriched dough contributes B vitamins and protein, while the milk and eggs add calcium and additional protein. The yeast provides B vitamins and minerals that support metabolism.
The key to enjoying these rich pastries as part of a balanced approach is portion control and occasional consumption. Their intense flavor and satisfying texture mean a single roll provides significant pleasure and satisfaction, potentially preventing overindulgence in other sweets. The homemade preparation allows you to control ingredient quality and avoid many of the preservatives found in commercial baked goods, creating a more wholesome indulgence for special occasions that celebrate both comfort and creativity in the kitchen.