There’s something absolutely magical about a dessert that throws convention out the window and delivers pure, unapologetic indulgence. This Reese’s peanut butter earthquake cake is exactly that kind of rebellious treat – it’s not going to win any beauty contests, but trust me when I say it will absolutely steal your heart and satisfy every chocolate-peanut butter craving you’ve ever had.
I honestly wasn’t sure how earthquake cakes got their name until I made my first one, but I’m guessing it has everything to do with how they look when they’re done baking. It literally looks like an earthquake hit the cake! And while it’s definitely not super pretty in the traditional sense, it is absolutely, undeniably delicious.
What makes this cake so special is those gooey layers of chocolate and peanut butter that swirl throughout, creating pockets of pure heaven in every single bite. Once you try this kind of cake, you’ll definitely want to experiment with other flavors – it’s just that addictive!
The inspiration for making this came from my eternal love affair with the chocolate-peanut butter combination, especially anything involving Reese’s. This cake takes that beloved flavor pairing and transforms it into something that feels both familiar and completely surprising at the same time.
Why This Earthquake Cake Will Rock Your World
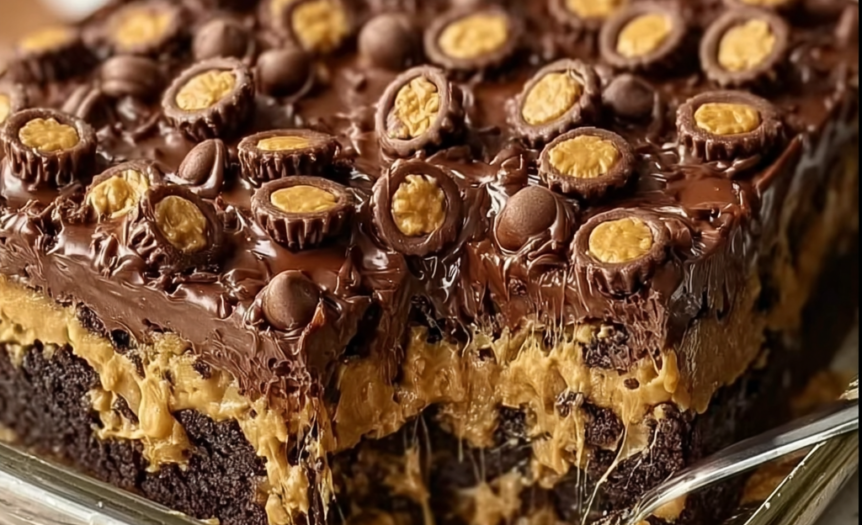
This cake satisfies any sweet tooth craving like nothing else. When that craving hits, this chocolate eruption recipe combines rich chocolate cake, Reese’s peanut butter cups, a peanut butter cheesecake mixture, and chocolate chips into the ultimate dessert experience.
What I love most about this recipe is how perfectly balanced it is – you couldn’t really ask for a better match than dense chocolate mixed with creamy peanut butter. The cream cheese frosting melts into the cake during baking to create those sticky, sweet pockets that make every bite different and exciting.
Despite looking like it came from a fancy bakery, this is something even the most novice bakers can pull off successfully. It uses a boxed cake mix as the base, making it both quick and foolproof.
Ingredients
For the Chocolate Cake Base:
- 1 box chocolate cake mix
- Eggs, oil, and water (as called for on cake mix box)
For the Peanut Butter Cream Cheese Layer:
- 8 oz cream cheese, softened to room temperature
- 1/2 cup (1 stick) salted butter, softened
- 1/2 cup creamy peanut butter
- 1 teaspoon vanilla extract
- 2 cups powdered sugar
For the Toppings:
- 1/2 cup semi-sweet chocolate chips
- 1/2 cup Reese’s Pieces
- 1 1/2 cups miniature Reese’s Peanut Butter Cups, cut into quarters
Step-by-Step Guide
1. Set up for success by preheating your oven to 350°F and spraying a 9×13-inch baking dish with nonstick cooking spray. Having everything properly greased ensures your earthquake cake releases effortlessly from the pan.
2. Create the chocolate foundation by preparing the chocolate cake mix according to package directions, mixing with the specified amounts of eggs, oil, and water. Pour the batter evenly into your prepared baking dish and set aside – don’t bake yet!
3. Make the magical peanut butter layer by using a hand mixer to combine softened cream cheese, butter, peanut butter, and vanilla extract until completely smooth. At first it might look “globby,” but keep beating until it becomes smooth and creamy. Gradually add the powdered sugar one cup at a time, mixing until the mixture is perfectly creamy and incorporated.
4. Create the earthquake effect by spooning the peanut butter mixture in dollops over the chocolate cake batter. Use a spoon or offset spatula to lightly spread it around, but don’t worry about spreading it perfectly – the peanut butter mixture will swirl and create that signature “earthquake” effect as it bakes.
5. Add the candy explosion by sprinkling the quartered Reese’s cups, chocolate chips, and Reese’s Pieces evenly over the top of the cake. This is where the magic really happens – every bite will have different combinations of these amazing mix-ins.
6. Bake to gooey perfection in the middle rack for 45-50 minutes. Start checking at the 45-minute mark with a toothpick – it should come out with a few moist crumbs but not wet batter. The center may still look a little soft, and that’s perfectly okay – it will firm up as it cools.
7. Serve for maximum impact by allowing the cake to cool for just a few minutes before serving. For the absolute best experience, serve warm with a scoop of vanilla ice cream or a drizzle of warmed peanut butter. The combination of warm cake, gooey peanut butter filling, and cool ice cream is truly irresistible!

Personal Stories and Kitchen Discoveries
The first time I made this cake, I was honestly a little skeptical. Could something that looked so chaotic really taste as good as everyone claimed? But that first bite completely converted me. There’s something about the way the peanut butter cream cheese layer creates these random pockets of creamy richness throughout the cake that makes every forkful a little adventure.
My kids have declared this their new favorite dessert, which is saying something considering they’re pretty devoted to traditional chocolate cake. They love hunting for the biggest pieces of Reese’s cups in each slice, and I love watching their faces light up when they find a particularly gooey section.
One reader tip that I absolutely swear by now is drizzling melted peanut butter over each slice when serving. It takes an already incredible dessert and pushes it completely over the top.
Customization Ideas That Work
The beauty of this recipe is how flexible it is with the toppings. You don’t have to use all the candy I suggested – you can pick your favorites or adjust the amounts to suit your tastes. Instead of chocolate chips, you could try peanut butter chips if you want to amp up the peanut butter factor even more.
For extra richness, try incorporating a tablespoon of peanut butter directly into the cake mix before adding the cream cheese layer. For some crunch, add chopped peanuts or pecans. If you’re feeling indulgent, drizzle caramel syrup over everything before baking for a salted caramel twist.
Storage and Serving Tips
This cake can be served at room temperature, warm, or straight from the fridge, though I personally prefer it served warm for that ultimate gooey experience. You can store it covered in the fridge and reheat slightly when ready to serve.
The cake keeps covered in the refrigerator for up to a week, or you can freeze leftover pieces for up to 3 months. To defrost, just move it from freezer to refrigerator overnight.
Why This Recipe Creates Magic
This cake is basically a cross between a chocolate peanut butter lava cake and a dump cake. It has that perfect cake-like consistency but with bits of cheesecake throughout that create the most incredible texture contrast you can imagine.
What I love most about this recipe is how it proves that not every dessert needs to be picture-perfect to be absolutely phenomenal. Sometimes the most delicious things are the ones that embrace their imperfections and focus entirely on flavor.
Final Thoughts
This Reese’s peanut butter earthquake cake has honestly changed how I think about dessert. It’s taught me that sometimes the most memorable treats are the ones that break all the traditional rules and focus entirely on creating an unforgettable flavor experience.
It’s chocolate heaven in cake form – rich, gooey, packed with peanut butter and chocolate in every bite, and absolutely perfect for anyone who believes that more is more when it comes to dessert.
Whether you’re looking to impress guests with something completely unexpected, need a dessert that feeds a crowd, or just want to treat yourself to something utterly indulgent, this earthquake cake delivers on every single front. It’s become one of those recipes that people specifically request when they know I’m bringing dessert, and I completely understand why.
Give this rebellious, beautiful mess of a cake a try, and prepare to have your dessert expectations completely rocked. Sometimes the best things in life are the ones that look a little chaotic but taste like pure perfection.