These golden arepas con queso represent the perfect harmony of textures—crispy, caramelized exteriors giving way to soft, pillowy interiors filled with molten cheese that stretches with every bite. This Venezuelan and Colombian staple transforms humble masa harina and cheese into something magical through the simple alchemy of proper technique and patient cooking. What makes these arepas truly special is their versatility and satisfying nature; they work equally well as a hearty breakfast, light lunch, or comforting dinner, while the cheese filling provides protein and richness that makes them a complete, satisfying meal in their own right.
Ingredients
For the Arepa Dough:
- 2 cups pre-cooked white corn flour (Harina P.A.N. or Maseca)
- 2½ cups warm water
- 1 teaspoon salt
- 1 tablespoon vegetable oil
- ½ teaspoon sugar (optional, for slight sweetness)
For the Cheese Filling:
- 2 cups queso blanco, shredded or crumbled
- 1 cup mozzarella cheese, shredded
- ½ cup queso fresco, crumbled
- 2 tablespoons cream cheese, softened
- ¼ teaspoon garlic powder
- Pinch of black pepper
For Cooking:
- 2-3 tablespoons vegetable oil or butter for pan-frying
- Additional oil for griddle cooking
For Serving (optional):
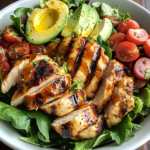
- Fresh avocado slices
- Pico de gallo or salsa
- Sour cream
- Hot sauce
- Fresh cilantro
- Lime wedges
Instructions
Step 1: Create the Perfect Dough Foundation
In a large mixing bowl, dissolve the salt and sugar (if using) in the warm water, stirring until completely dissolved. The water should be comfortably warm to the touch—not hot enough to cook the flour, but warm enough to help hydrate it properly.
Gradually add the pre-cooked corn flour while stirring continuously with a wooden spoon or your hands. This gradual addition prevents lumps from forming and ensures even hydration throughout the mixture.
Add the vegetable oil and continue mixing until the dough comes together. The consistency should be smooth and pliable, similar to Play-Doh, without being sticky or crumbly. If the dough feels too dry, add water one tablespoon at a time; if too wet, add more flour gradually.
Step 2: Rest and Develop the Dough
Cover the bowl with a damp kitchen towel and let the dough rest for 5-10 minutes. This resting period allows the corn flour to fully hydrate and the dough to develop its characteristic texture.
After resting, knead the dough briefly in the bowl with your hands until it becomes smooth and uniform. The final dough should hold together well when pressed but not stick to your hands excessively.
Step 3: Prepare the Cheese Mixture
In a medium bowl, combine the shredded queso blanco, mozzarella, crumbled queso fresco, and softened cream cheese. Mix gently with a fork until well combined but not mashed.
Season with garlic powder and a pinch of black pepper. The mixture should hold together when pressed but remain light and airy. The combination of cheeses provides different melting properties and flavors—queso blanco for authenticity, mozzarella for stretch, queso fresco for texture, and cream cheese for richness.
Step 4: Form the Arepas with Precision
Divide the dough into 8 equal portions, each about the size of a tennis ball. Keep the unused portions covered with a damp towel to prevent drying out.
Working with one portion at a time, roll it into a smooth ball between your palms, then flatten into a disc about 4-5 inches in diameter and ½-inch thick. The edges should be smooth without cracks—if cracks appear, the dough needs more moisture.
Step 5: Master the Filling Technique
Place about 2-3 tablespoons of the cheese mixture in the center of each disc, leaving a 1-inch border around the edges. Don’t overfill—the cheese will expand as it melts and could burst through the dough.
Carefully fold the edges of the dough over the filling, pinching and sealing the seams thoroughly. Roll the filled dough gently between your palms to create a smooth ball, then flatten slightly into a thick disc about 3-4 inches wide.
Ensure all seams are well-sealed to prevent cheese from leaking during cooking. The arepas should feel substantial but not overly thick.
Step 6: Achieve the Perfect Cook
Heat a cast-iron skillet, comal, or heavy griddle over medium heat. Lightly brush or spray with oil to prevent sticking.
Place the arepas on the hot surface and cook for 5-7 minutes on the first side without moving them. You want to develop a golden-brown crust that will provide textural contrast to the soft interior.
Flip carefully when the bottom is golden brown and crispy. Cook for another 5-6 minutes on the second side until equally golden and crispy.
Step 7: Finish with Oven Heating
Preheat your oven to 350°F. Transfer the pan-fried arepas to a baking sheet and bake for 10-15 minutes to ensure the centers are heated through and the cheese is completely melted.
This two-stage cooking method ensures crispy exteriors while guaranteeing the cheese filling is perfectly melted and the dough is cooked through without burning the outside.
Step 8: Rest and Serve
Allow the arepas to rest for 2-3 minutes after removing from the oven—this brief cooling period prevents the molten cheese from burning your mouth while still serving them warm.
Serve immediately while the cheese is still stretchy and the exteriors are at their crispiest. The contrast between the crunchy outside and creamy inside is best enjoyed fresh from cooking.
Prep Time: 30 minutes | Cook Time: 25 minutes | Total Time: 55 minutes | Servings: 8 arepas | Calories: 285 per arepa
Understanding Masa Harina and Corn Flour
The foundation of great arepas lies in using the correct type of corn flour. Pre-cooked white corn flour (masa harina) is essential—regular cornmeal or polenta won’t work because they haven’t been processed through the nixtamalization process that makes the corn digestible and gives it the proper binding properties.
Harina P.A.N. is the gold standard brand from Venezuela, specifically formulated for arepas with the ideal texture and flavor. Maseca, while primarily designed for tortillas, also works well and is more widely available in many areas.
The pre-cooking process of the corn flour means it only needs hydration and brief cooking to become tender and flavorful. This is why arepas can be made so quickly compared to other corn-based foods that require long cooking times.
The Art of Dough Consistency
Perfect arepa dough should feel smooth and pliable without being sticky or crumbly. The texture is often compared to Play-Doh—it should hold together well when shaped but not stick to your hands excessively.
Water temperature matters more than many realize. Warm water helps the corn flour hydrate more evenly and quickly, while cold water can result in lumpy, poorly hydrated dough. The small amount of oil adds richness and helps create a more tender texture.
If your dough cracks when you try to shape it, it needs more moisture. Add water one tablespoon at a time until it becomes pliable. If it’s too sticky to handle, incorporate more corn flour gradually until it reaches the right consistency.
Cheese Selection and Combination Strategy
The cheese blend in these arepas is carefully chosen to provide different qualities that work together harmoniously. Queso blanco provides authentic Venezuelan/Colombian flavor with good melting properties and mild, creamy taste.
Mozzarella adds the stretchy, stringy quality that makes these arepas so satisfying to eat—that Instagram-worthy cheese pull that happens when you break them open. However, mozzarella alone would be too mild and lacks the characteristic Latin American cheese flavor.
Queso fresco contributes texture and a slight tanginess that balances the richness of the other cheeses, while cream cheese acts as a binder that helps everything melt together smoothly while adding extra richness.

Advanced Shaping and Sealing Techniques
Proper sealing is crucial for preventing cheese leakage during cooking. After placing the filling in the center, imagine you’re making a dumpling—bring the edges up and over the filling, pinching firmly to create a good seal.
Roll the sealed arepa gently between your palms to redistribute the filling and smooth out any seam lines. The final shape should be a slightly flattened ball with no visible seams or thin spots where cheese could break through.
If an arepa does leak during cooking, don’t panic—just flip it seam-side down and press gently with a spatula to help seal the leak. Most minor leaks will seal themselves as the outside crisps up.
Mastering the Two-Stage Cooking Method
The combination of stovetop searing and oven finishing is key to perfect arepas. The hot skillet creates the crispy, caramelized exterior that provides textural contrast, while the gentler oven heat ensures the interior cooks through without burning the outside.
Don’t rush the initial searing—patience here pays off with better flavor and texture. The golden-brown crust should develop naturally over 5-7 minutes. Moving the arepas too early can cause sticking and prevent proper browning.
The oven finish ensures food safety by bringing the entire arepa to proper temperature while melting the cheese completely. This step also helps any minor seal issues resolve as the dough softens slightly in the gentle heat.
Creative Filling Variations
While cheese is classic, arepas welcome countless filling variations. For heartier versions, add cooked and seasoned ground turkey, shredded chicken, or black beans to the cheese mixture.
Vegetable lovers can incorporate sautéed bell peppers, onions, or corn kernels for added flavor and nutrition. The key is ensuring any additional ingredients are well-drained and not too wet, which could make the dough soggy.
For breakfast versions, consider adding scrambled eggs to the cheese mixture, or create sweet arepas with a filling of cream cheese sweetened with honey and cinnamon.
Regional variations might include specific cheese types like queso de freír or queso llanero if you can find them, which provide more authentic flavors for different Latin American regions.
Troubleshooting Common Challenges
Arepas Fall Apart: Usually indicates the dough was too dry or wasn’t kneaded sufficiently. The dough should be pliable and hold together well when shaped.
Cheese Leaks Out: Often caused by overfilling, inadequate sealing, or cooking at too high heat initially. Ensure proper sealing and use medium heat for the initial cooking.
Soggy Texture: Typically results from insufficient initial browning or cooking at too low heat. The crispy exterior is essential for proper texture contrast.
Uneven Cooking: Can be caused by arepas of different sizes or uneven heat distribution. Try to make uniform sizes and know your cooking surface’s hot spots.
Storage and Reheating Strategies
Cooked arepas can be stored in the refrigerator for up to 3 days and reheated in a 350°F oven for 8-10 minutes until heated through. This method restores much of the original crispy texture.
For longer storage, cool completely and freeze in a single layer, then transfer to freezer bags. Frozen arepas can be reheated directly from frozen in a 375°F oven for 15-20 minutes.
Uncooked shaped arepas can be frozen before cooking—just increase the cooking time slightly to account for the frozen state. This makes them perfect for meal prep.
Nutritional Benefits and Considerations
Arepas provide complex carbohydrates from the corn flour and substantial protein from the cheese filling, making them a relatively balanced meal option. The corn flour is naturally gluten-free, making arepas suitable for those with gluten sensitivities.
The cheese blend provides calcium and protein, while the corn contributes fiber and B vitamins. For lighter versions, you can reduce the cheese quantity slightly or use part-skim mozzarella.
Adding vegetables to the filling increases the nutritional value while providing additional fiber, vitamins, and minerals that complement the basic arepa ingredients.
Cultural Context and Serving Traditions
Arepas are deeply embedded in Venezuelan and Colombian culture, serving as a versatile foundation for countless meals throughout the day. They’re often served with additional toppings or sides that vary by region and personal preference.
Traditional accompaniments include sliced avocado, which provides creamy richness that complements the crispy arepa texture. Pico de gallo or fresh salsa adds bright acidity that cuts through the cheese richness.
In many Latin American households, arepa-making is a communal activity where family members help shape and fill the arepas together, creating both delicious food and cherished memories.
Scaling for Different Occasions
This recipe doubles easily for large gatherings or meal prep sessions. Consider making different varieties with various fillings to provide options for different tastes and dietary preferences.
For parties, mini arepas make excellent appetizers—use about half the dough and filling per piece for bite-sized versions that are perfect for standing and socializing.
The make-ahead friendly nature of arepas makes them ideal for busy weeknight dinners or weekend breakfast gatherings where you want something special without last-minute stress.
Equipment Considerations and Alternatives
While a cast-iron skillet or comal provides the best results for developing the crispy exterior, any heavy-bottomed pan will work. The key is even heat distribution and good heat retention.
If you don’t have an oven, you can finish cooking the arepas entirely on the stovetop by covering the pan and reducing heat to low for the final cooking stage. This steams them gently while maintaining the crispy bottom.
For outdoor cooking, arepas work beautifully on a griddle over medium coals, providing a subtle smoky flavor that enhances their natural corn taste.
Final Thoughts
Homemade Arepas con Queso represent the beautiful simplicity of Latin American comfort food—humble ingredients transformed through proper technique into something truly satisfying and delicious. The contrast between the crispy, golden exterior and the warm, melty cheese interior creates a textural experience that’s both comforting and exciting, while the corn flavor provides an earthy foundation that makes these feel both substantial and wholesome.
Learning to make arepas opens up a world of possibilities for quick, satisfying meals that work any time of day. The technique, once mastered, becomes second nature, and the endless variety of possible fillings means you’ll never get bored with this versatile food. Whether you’re seeking an authentic taste of Venezuelan and Colombian cuisine or simply looking for a new way to enjoy cheese and corn, these arepas deliver satisfaction on every level.
The joy of breaking open a perfectly cooked arepa and watching the cheese stretch and steam is matched only by that first bite—the crunch giving way to pillowy softness and molten cheese that somehow feels both indulgent and nourishing. This is comfort food at its finest, proving that the best recipes often come from the simplest combinations of quality ingredients and time-honored techniques.