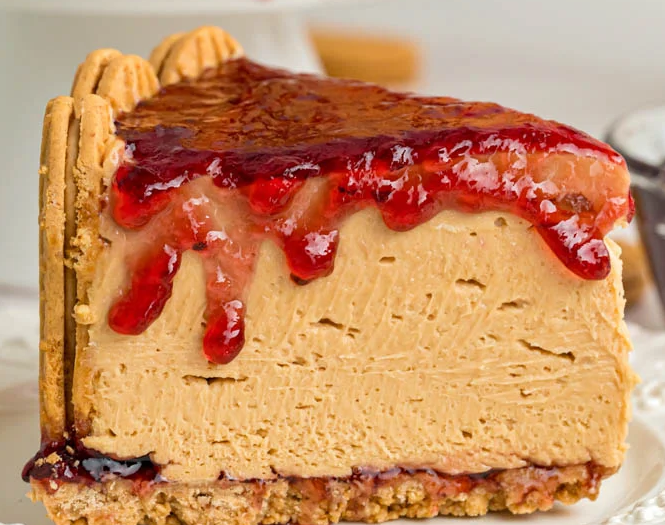
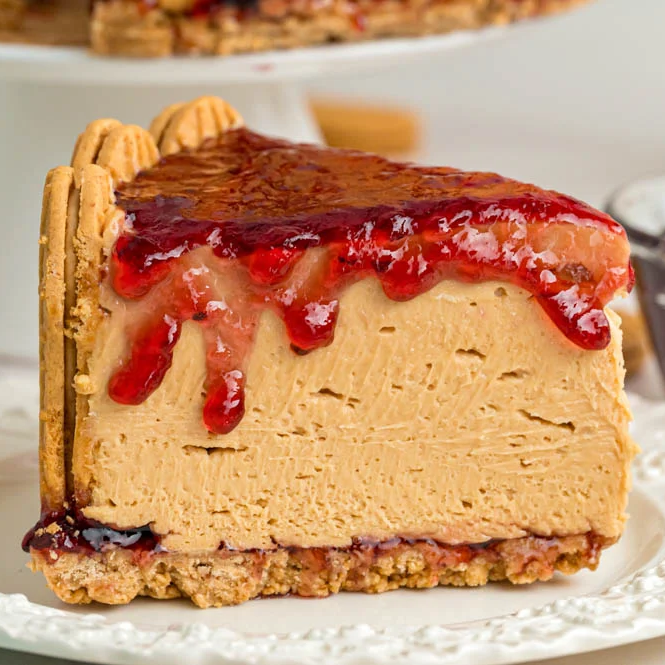
This Peanut Butter and Jelly Cheesecake is a rich, no-bake dessert that transforms the nostalgic PB&J combination into a creamy, indulgent treat. Featuring a buttery Nutter Butter crust, a smooth peanut butter cheesecake filling, and a sweet grape jelly topping, it delivers bold flavor with a soft, mousse-like texture. Perfect for make-ahead desserts, it’s both impressive and incredibly easy to prepare.
Why You’ll Love This Recipe
- No-Bake Simplicity – No oven required, making it perfect for stress-free dessert prep
- Nostalgic Flavor – Captures the classic peanut butter and jelly taste in a decadent form
- Ultra Creamy Texture – Light yet rich filling thanks to whipped topping incorporation
- Make-Ahead Friendly – Sets beautifully in the fridge, ideal for planning ahead
- Customizable Toppings – Easily switch jelly flavors or add mix-ins for variety
- Crowd-Pleasing Dessert – Perfect for parties, gatherings, and celebrations
Ingredients You’ll Need
For the Crust
- 24 Nutter Butter cookies, crushed – create a flavorful, peanut-butter-rich base
- 6 tablespoons unsalted butter, melted – binds crumbs into a firm crust
- 10–12 whole Nutter Butter cookies – line the edges for structure and visual appeal
For the Cheesecake Filling
- 3 (8 oz) blocks cream cheese, room temperature – provide a smooth, creamy base
- 1½ cups powdered sugar – sweetens and stabilizes the filling
- 1 teaspoon vanilla extract – enhances overall flavor
- 30 oz creamy peanut butter – delivers bold peanut flavor and richness
- 16 oz whipped topping (Cool Whip) – lightens the texture for a mousse-like consistency
For the Jelly Layer
- ¾ cup grape jelly (divided) – adds sweetness and signature PB&J contrast
Step-by-Step Instructions
- Prepare the Pan – Line a 9-inch springform pan with parchment paper for easy removal
- Make the Crust – Mix crushed cookies with melted butter until evenly combined, then press firmly into the bottom of the pan
- Add Cookie Border – Stand whole Nutter Butter cookies vertically along the edge for structure and presentation
- Spread Jelly Base – Layer about ¼ cup of grape jelly evenly over the crust
- Beat Cream Cheese – Using a mixer, beat cream cheese until smooth and fluffy
- Incorporate Sugar and Vanilla – Add powdered sugar and vanilla extract, mixing until fully combined
- Add Peanut Butter – Blend in peanut butter until the mixture is smooth and creamy
- Fold in Whipped Topping – Gently fold in whipped topping with a spatula to maintain a light texture
- Assemble the Filling – Pour the mixture over the jelly layer and smooth the top evenly
- Add Final Jelly Layer – Spread remaining jelly over the top, warming slightly if needed for easier spreading
- Chill to Set – Cover and refrigerate for at least 4 hours or overnight for best results
- Slice and Serve – Remove from pan, slice cleanly, and serve chilled
Recipe Notes & Tips
- Room Temperature Ingredients – Ensures a smooth, lump-free filling
- Don’t Overmix After Folding – Preserves the light, airy texture
- Firm Crust Pressing – Prevents crumbling when slicing
- Chill Overnight for Best Results – Improves flavor and structure
- Warm Jelly Slightly – Makes spreading easier without tearing the surface
- Clean Slice Technique – Use a warm knife for neat, professional slices
Nutritional Information
- Prep Time: 25 minutes
- Chilling Time: 4 hours
- Total Time: 4 hours 25 minutes
- Servings: 10 slices
- Calories: ~1303 kcal per serving (estimated based on ingredients used)
Perfect Pairings
- Fresh Berries – Add brightness and contrast to the rich dessert
- Cold Milk – Complements the peanut butter flavor perfectly
- Hot Coffee – Balances sweetness with bitterness
- Vanilla Ice Cream – Enhances creaminess for an indulgent treat
Ideal Occasions
- Birthday Celebrations – Fun and nostalgic dessert option
- Family Gatherings – Great for sharing and easy to prepare ahead
- Holiday Desserts – Adds variety to dessert tables
- Potlucks and Parties – Transportable and visually appealing
Storage & Serving Tips
- Refrigeration – Store tightly covered in the fridge for up to 4 days
- Freezing Option – Freeze without jelly topping for up to 2 months
- Thaw Properly – Defrost overnight in the refrigerator before serving
- Serve Chilled – Best texture and flavor when cold
Creative Variations to Try
- Berry Swap – Use strawberry or raspberry jelly instead of grape
- Crunchy Texture – Add chopped peanuts or chocolate chips to the filling
- Chocolate PB&J – Drizzle melted chocolate over the top
- Homemade Whipped Cream – Substitute Cool Whip with freshly whipped cream
Troubleshooting Common Issues
- Filling Too Soft – Chill longer or overnight for better structure
- Crust Falling Apart – Press more firmly and ensure proper butter ratio
- Lumpy Filling – Use fully softened cream cheese and mix thoroughly
- Jelly Hard to Spread – Warm slightly to loosen before applying
Why This Recipe Works
This recipe works by combining a stable no-bake cheesecake base with a balanced ratio of fat and sweetness. Cream cheese and peanut butter provide structure and richness, while whipped topping introduces air for a lighter texture. The cookie crust offers a firm, flavorful foundation, and the jelly layers create contrast with acidity and sweetness. Chilling allows the fats to solidify, giving the cheesecake its sliceable consistency. At around 1303 calories per serving, it’s a highly indulgent dessert that can be adapted with lighter ingredients or smaller portions.
Final Thoughts
Peanut Butter and Jelly Cheesecake is a playful yet decadent dessert that elevates a childhood favorite into a show-stopping treat. Its creamy texture, bold flavors, and no-bake convenience make it a standout choice for any occasion. Whether you keep it classic or experiment with variations, it’s a dessert that delivers both nostalgia and indulgence in every bite.