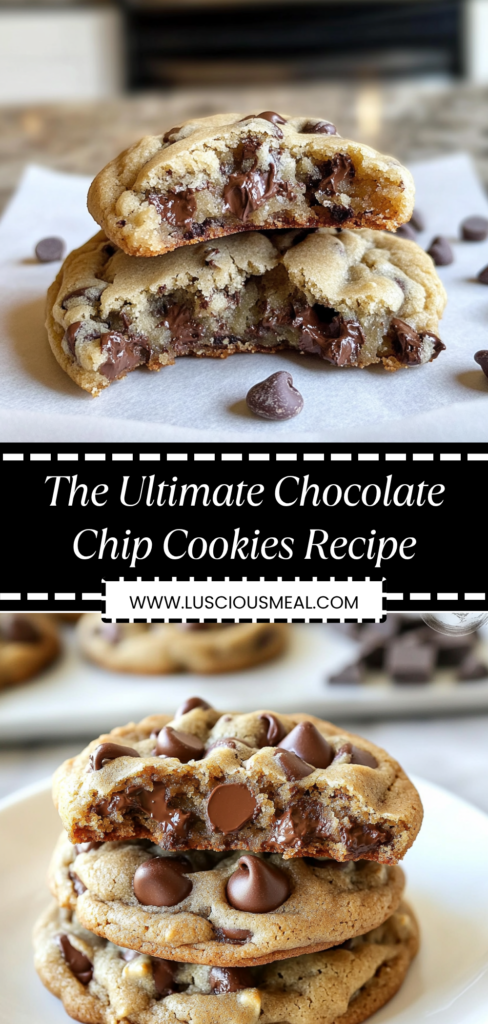
These ultimate chocolate chip cookies deliver the perfect balance of soft, chewy texture and rich chocolate flavor that defines cookie perfection. The carefully crafted recipe creates cookies with crispy edges, tender centers, and plenty of chocolate chips in every bite, using technique and ingredient choices that ensure consistent, bakery-quality results every time. If you enjoy this style of classic American cookie perfection, you might also like brown butter chocolate chip cookies, oatmeal chocolate chip cookies, or other variations that build on this timeless foundation.
Why You’ll Love This Recipe
- Perfect texture balance – achieves the ideal combination of slightly crispy edges with soft, chewy centers that stay tender for days after baking
- Chocolate chip perfection – uses the optimal ratio and type of chocolate chips to ensure every bite delivers rich chocolate flavor without overwhelming the cookie base
- Consistent results – precise measurements and techniques eliminate guesswork, producing uniformly excellent cookies that look and taste professionally made
- Make-ahead friendly – dough can be portioned and frozen for up to 3 months, allowing fresh-baked cookies anytime with minimal effort
Ingredients Breakdown
All-purpose flour: The structural foundation that creates the perfect cookie texture when measured and mixed properly. Spoon flour into measuring cups and level off rather than scooping directly, which can pack too much flour and create dense cookies. The protein content in all-purpose flour provides enough structure without making cookies tough. Some bakers prefer a combination of bread flour and cake flour for optimal chewiness, but all-purpose flour produces excellent results when handled correctly.
Brown sugar and granulated sugar: The combination that creates the signature texture and flavor profile. Brown sugar contributes moisture and molasses flavor while helping create chewy texture, while granulated sugar promotes spreading and crispy edges. Light brown sugar offers subtle molasses notes, while dark brown sugar provides more intense flavor. The ratio of brown to white sugar significantly affects final texture – more brown sugar creates chewier cookies, while more granulated sugar creates crispier results.
Butter: The fat that provides flavor, tenderness, and proper texture development. Use unsalted butter at room temperature that yields to pressure but still holds its shape. European-style butter with higher fat content produces richer flavor and better texture, though standard butter works excellently. The butter should be creamed properly with the sugars to incorporate air and create the light texture essential to great cookies. Avoid melted butter unless specifically called for, as it creates different texture entirely.
Eggs: Bind ingredients together while adding moisture and richness that creates tender texture. Room temperature eggs incorporate more smoothly than cold eggs, creating better emulsion and more even mixing. Large eggs provide consistent results and proper hydration. The eggs should be added one at a time and mixed just until incorporated to avoid overworking the dough. Fresh eggs produce better flavor and texture than older ones.
Chocolate chips: The star ingredient that defines these cookies. Use high-quality chocolate chips with good cocoa content – semi-sweet chips with 60% cacao provide excellent balance of sweetness and chocolate flavor. Avoid chips that contain excessive stabilizers, which can affect melting and flavor. Mini chips distribute more evenly but provide less dramatic chocolate impact, while chunks create more varied texture and appearance. The amount should be generous enough for chocolate in every bite without overwhelming the cookie base.
Step-by-Step Instructions
- Preheat your oven to 375°F (190°C) and line two large baking sheets with parchment paper. The moderate-high temperature ensures proper spreading and browning without burning the delicate cookies. Position racks in the upper and lower thirds of the oven for even baking of multiple sheets. Having equipment ready before mixing ensures smooth workflow.
- In a medium bowl, whisk together 2 1/4 cups all-purpose flour, 1 teaspoon baking soda, and 1 teaspoon salt. Whisk thoroughly to ensure even distribution of leavening and seasoning throughout the flour. The salt enhances all flavors while the baking soda provides proper lift and browning. Set aside this flour mixture for later incorporation.
- In a large mixing bowl, cream together 1 cup (2 sticks) softened unsalted butter, 3/4 cup packed light brown sugar, and 1/2 cup granulated sugar using an electric mixer on medium speed for 3-4 minutes until light and fluffy. The mixture should be noticeably lighter in color and increased in volume when properly creamed. This step incorporates air essential for proper texture.
- Beat in 2 large eggs one at a time, ensuring each is fully incorporated before adding the next. Add 2 teaspoons pure vanilla extract and mix until combined. The mixture should be smooth and uniform without streaks of unmixed egg. Don’t overmix after adding eggs, which can develop gluten and create tough cookies.
- Reduce mixer speed to low and gradually add the flour mixture, mixing just until combined. Don’t overmix – stop as soon as no dry flour is visible. The dough should come together but still look slightly rough. Overmixing develops gluten, creating tough rather than tender cookies.
- Fold in 2 cups chocolate chips using a wooden spoon or rubber spatula, distributing them evenly throughout the dough. Reserve a few extra chips to press into the tops of shaped cookies for better appearance. The chips should be well-distributed but not broken from excessive mixing.
- Using a cookie scoop or rounded tablespoons, portion the dough into balls approximately 1 1/2 inches in diameter. Place them on the prepared baking sheets, spacing them about 2 inches apart to allow for spreading. For the most uniform results, weigh each portion to ensure consistent sizing.
- Lightly press a few extra chocolate chips into the top of each cookie ball for enhanced appearance and chocolate distribution. This step ensures every cookie has visible chocolate on the surface, creating more appealing presentation and guaranteeing chocolate in every bite.
- Bake for 9-11 minutes until the edges are set and lightly golden brown while the centers still look slightly soft and underdone. The cookies will continue cooking on the hot pan after removal from the oven. Don’t overbake – they should look slightly underdone when removed for the perfect final texture.
- Let cookies cool on the baking sheet for 5 minutes to set properly, then transfer to a wire rack to cool completely. This brief cooling period prevents breaking while allowing them to firm to the perfect texture. The cookies will continue to set during this time, reaching ideal consistency.
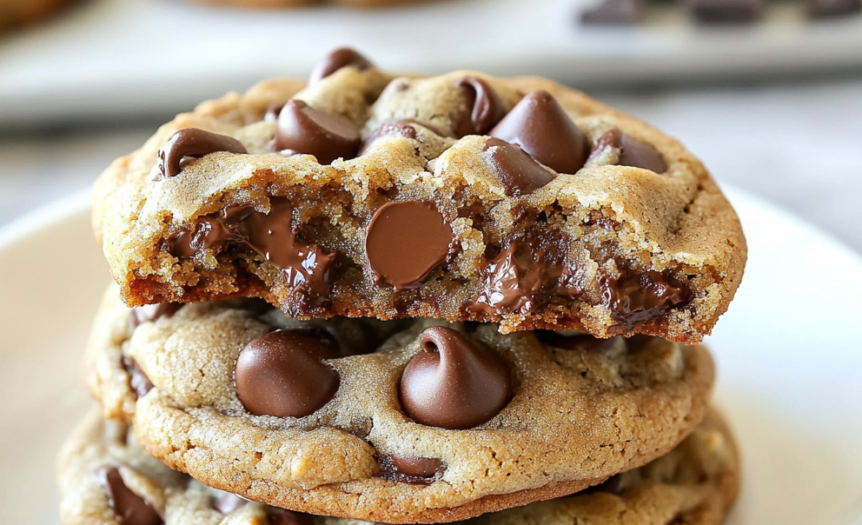
Perfect Texture: What to Look For
The ultimate chocolate chip cookies should have slightly crispy, golden-brown edges that give way to soft, chewy centers with a tender crumb that’s neither dense nor cake-like. When properly baked, the cookies should be set around the edges but still look slightly soft in the center when removed from the oven. As they cool, they should firm up to the perfect texture that holds together when picked up but yields easily when bitten. The chocolate chips should be evenly distributed throughout, providing bursts of rich chocolate flavor in every bite without overwhelming the cookie base.
Customization Options
This perfect base recipe welcomes numerous delicious variations while maintaining its essential character. For extra richness, brown the butter before creaming with sugars for nutty depth. Add 1/2 cup chopped toasted nuts like walnuts or pecans for crunch and flavor complexity. Create sea salt chocolate chip cookies by sprinkling flaky sea salt on top before baking. For different chocolate experiences, use a combination of chocolate chips, chunks, and mini chips. Substitute different extracts like almond or rum for unique flavor profiles, or add 1 tablespoon instant espresso powder for mocha versions.
Practical Tips
Measuring accuracy: Proper measuring is crucial for consistent results. Spoon flour into measuring cups and level off rather than scooping, which can add 20-30% more flour than intended. Use a kitchen scale for the most accurate measurements if available.
Butter temperature: Room temperature butter should yield to pressure but still hold its shape. If your kitchen is very warm, cream quickly and chill the dough briefly before baking. If butter is too cold, cut into pieces and let sit at room temperature for 15-20 minutes.
Baking timing: Underbake slightly rather than overbaking. Cookies continue cooking on hot pans after removal from the oven, so they should look slightly underdone when removed. Different oven hot spots may require rotating pans halfway through baking.
Storage: Store completely cooled cookies in airtight containers for up to 1 week at room temperature. For longer storage, freeze baked cookies for up to 3 months, or freeze shaped dough balls for fresh cookies anytime.
Common Questions
Why are my cookies too flat or too thick? Cookie spreading is affected by butter temperature, flour amount, and oven temperature. Too-soft butter or insufficient flour creates flat cookies, while cold butter or too much flour creates thick, dense cookies. Ensure butter is properly softened and flour is measured accurately.
Can I make the dough ahead of time? Yes, cookie dough can be refrigerated for up to 3 days or frozen for up to 3 months. Chill shaped dough balls on baking sheets until firm, then transfer to freezer bags. Bake directly from frozen, adding 1-2 minutes to baking time.
How do I get consistent cookie sizes? Use a cookie scoop or weigh each portion for uniform results. A #20 scoop (about 1 1/2 tablespoons) creates perfectly sized cookies. Consistent sizing ensures even baking and professional appearance.
Why don’t my cookies stay soft? Overbaking is the most common cause of hard cookies. Remove them when edges are set but centers still look slightly soft. Proper storage in airtight containers also helps maintain texture. Adding an extra egg yolk can increase tenderness.
Serving Suggestions
These perfect chocolate chip cookies work beautifully for any occasion, from casual family treats to elegant dessert presentations. For everyday enjoyment, serve them warm from the oven with cold milk for the classic American experience. The cookies travel well for lunch boxes, picnics, or potluck contributions, maintaining their texture and appeal for hours after baking.
For special occasions, arrange them on attractive platters alongside other homemade treats, or package them individually in clear bags tied with ribbon for thoughtful gifts. The cookies also work wonderfully as ice cream sandwich bases, or can be crumbled over desserts for added texture and flavor. Their universal appeal makes them perfect for bake sales, office treats, or any situation where you want to share something that everyone will genuinely enjoy.
Nutritional Benefits
While definitely a treat to be enjoyed in moderation, these homemade cookies do provide some nutritional advantages over many commercial varieties. The use of real butter contributes vitamin A and beneficial fatty acids, while the eggs provide complete protein and various B vitamins. By making them at home, you control ingredient quality and avoid many of the preservatives and artificial ingredients found in store-bought options.
The moderate portion size of homemade cookies often provides more satisfaction than processed alternatives, potentially reducing the desire to overindulge. The quality ingredients and balanced sweetness create treats that satisfy cravings effectively without the need for excessive consumption. When enjoyed as part of a balanced approach to eating, these cookies represent the kind of homemade indulgence that supports both physical and emotional well-being through the pleasure and comfort that comes from exceptional homemade treats.