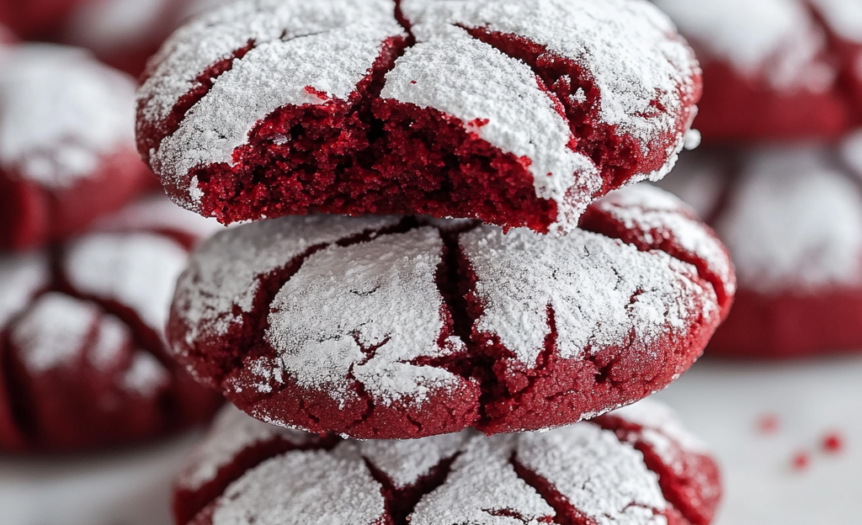
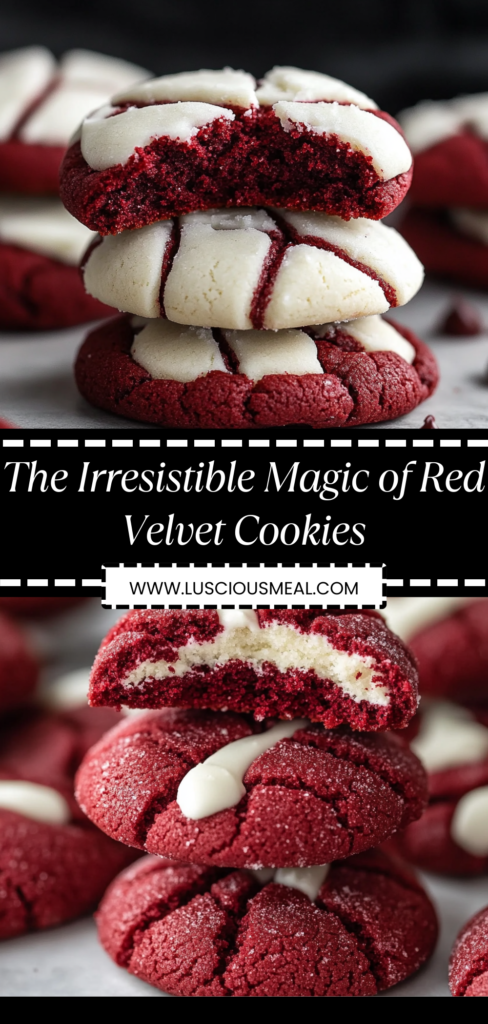
Vibrant crimson cookies with delicate chocolate notes and cream cheese chips create an eye-catching treat that tastes as spectacular as it looks. These irresistible red velvet cookies transform the beloved cake flavor into convenient handheld form perfect for everything from holiday cookie platters to everyday indulgence. The delightful contrast between tender, slightly chocolatey interior and creamy white morsels creates something far more interesting than standard cookies. I first created these for a Valentine’s gathering and returned home with an empty platter and multiple recipe requests.
Why You’ll Love This Recipe
• Creates stunning visual impact with minimal decorating effort • Delivers authentic red velvet flavor in convenient cookie form • Makes perfect gift presentation with dramatic color contrast • Provides showstopping option for cookie exchanges • Works beautifully for both special occasions and everyday treats
My neighbor initially questioned whether cookies could truly capture the distinctive red velvet experience she enjoys in cake form. After her first bite revealing the perfect balance between subtle cocoa, vanilla undertones, and tangy cream cheese elements, she immediately asked for the recipe to make for her book club meeting. Sometimes reimagined classics create even more satisfying experiences than their inspiration by enhancing convenience without sacrificing flavor authenticity.
Quality Ingredients
• Unsalted butter creates tender structure and rich flavor foundation • Granulated sugar provides sweetness while contributing to fine texture • Brown sugar adds moisture and caramel notes throughout • Fresh eggs bind components while adding richness and structure • Pure vanilla extract introduces warm aromatic notes • Natural cocoa powder delivers subtle chocolate undertones • Red food coloring creates signature vibrant appearance • All-purpose flour establishes perfect cookie structure • White chocolate chips provide creamy contrast against red background
Cocoa selection dramatically impacts your final result. I prefer natural unsweetened cocoa powder rather than Dutch-processed varieties for these cookies. The natural acidity creates truer red velvet flavor while interacting properly with leavening agents for ideal texture. While premium brands offer excellent results, standard grocery store options like Hershey’s work perfectly for this specific application. My pastry chef friend emphasized that red velvet requires balanced cocoa presence—enough for distinctive flavor but restrained enough to allow signature color to develop properly, wisdom that prevents common pitfall of overly chocolatey versions that miss the mark on authentic red velvet character.
Baking Method
Create Butter Base Cream room temperature butter with both sugars until notably lighter in color and fluffy in texture, typically 3-4 minutes with electric mixer. This extended creaming creates essential air pockets that contribute to final texture. Continue beating until mixture appears almost whipped with visible volume increase from starting ingredients.
Develop Color and Flavor Add eggs one at a time, incorporating completely before adding next. This gradual approach prevents mixture separation while maintaining proper emulsion. Introduce vanilla extract, cocoa powder, and red food coloring, mixing thoroughly until absolutely uniform in color throughout without streaking. The vibrant red hue should appear consistent without any lingering patches of brown from cocoa or lighter areas from incomplete mixing.
Combine Dry Ingredients Whisk together flour, baking soda, baking powder, and salt in separate bowl until evenly distributed. This preliminary mixing prevents pockets of leavening or salt in final cookies. Add to wet ingredients gradually, mixing on low speed just until combined with no visible flour pockets remaining. Avoid overmixing which develops gluten and toughens final texture.
Add Signature Inclusions Fold in white chocolate chips, distributing evenly throughout dough without overmixing. For authentic red velvet experience, consider using cream cheese flavored chips when available for additional tangy element. Alternatively, standard white chocolate provides classic visual contrast against vibrant cookie base.
Chill For Success Cover dough and refrigerate until firm enough to scoop without excessive sticking, typically one hour minimum though overnight chilling develops even better flavor. This crucial chilling period allows flour to hydrate properly while solidifying butter for proper spreading during baking. Without sufficient chilling, cookies spread excessively and lack distinctive texture.
Shape With Precision Scoop chilled dough using cookie scoop or tablespoon measure for consistent sizing. Roll between palms to create smooth balls if desired for more uniform appearance. Place on parchment-lined baking sheets with adequate spacing to allow spreading. For bakery-style presentation, reserve some white chocolate chips to place on cookie tops just before baking.
Bake To Perfection Place in preheated oven and bake just until edges appear set while centers remain slightly soft, typically 10-12 minutes depending on size. Avoid overbaking which diminishes both vibrant color and soft interior texture essential to these cookies. Allow cooling on baking sheet briefly before transferring to wire rack for complete cooling.
My first attempt at red velvet cookies taught me important lessons about coloring agents. Using liquid food coloring required excessive amounts that affected dough consistency, while attempting natural alternatives like beet powder created disappointing brownish hue. Subsequent batches with gel food coloring delivered the vibrant red color without texture compromise. Baking often requires understanding ingredient properties beyond basic measurements for truly spectacular results.
You Must Know
• Room temperature butter and eggs create proper structure impossible with cold ingredients • Gel food coloring provides most intense color with minimal liquid addition • Chilling dough prevents excessive spreading during baking • Cookies will appear slightly underdone when perfect for removal • Visual color dulls slightly during baking but maintains distinctiveness
My father, who normally avoids “fancy cookies” in favor of traditional chocolate chip, surprised everyone by consuming four of these in rapid succession at our holiday gathering. He specifically commented on how they reminded him of the red velvet cake his mother made for special occasions during his childhood. Creating food that connects people with cherished memories provides the deepest satisfaction a home baker can experience.
Finishing Touches
These already-impressive cookies welcome simple enhancements that elevate them further for special occasions. Cream cheese drizzle creates authentic red velvet cake experience by combining softened cream cheese with powdered sugar and heavy cream until pourable consistency, then drizzling across cooled cookies in delicate pattern. White chocolate dip transforms cookies by partially immersing cooled cookies in melted white chocolate for dramatic half-and-half appearance. Holiday sparkle adds festive element through light sprinkle of white sanding sugar before baking, creating subtle glimmer against vibrant background. For Valentine’s celebration, consider heart-shaped cookie cutter pressed gently into dough balls before baking for thematic presentation.
Gift Presentation
Thoughtful packaging transforms these visually stunning cookies into memorable handmade presents requiring minimal additional effort. Layer between parchment paper in decorative tins or boxes with clear viewing window to showcase dramatic color. For Valentine’s gifting, place in cellophane bags tied with contrasting white and silver ribbons. Mason jars with fabric-topped lids create country-inspired packaging perfect for casual giving. Consider alternating layers of red velvet cookies with contrasting chocolate or vanilla varieties for spectacular striped appearance when presented in clear glass containers.
Storage Secrets
Proper handling ensures these cookies maintain their appeal for extended enjoyment. Store completely cooled cookies in airtight container with parchment paper between layers to prevent color transfer. Expect quality to remain excellent for approximately five days at room temperature when properly stored. For longer preservation, place fully cooled cookies in freezer-safe container with parchment between layers and freeze up to three months. Thaw at room temperature before serving for best texture restoration. For freshly baked taste after storage, warm room temperature cookies for 5-10 seconds in microwave, creating just enough heat to slightly soften without melting chips.
Baking Wisdom
• Test oven temperature with separate thermometer as many run hot or cold • Position rack in center position for most even baking results • Rotate baking sheet halfway through cooking if oven has hot spots
The magical appeal of these red velvet cookies lies in their perfect balance between visual drama and genuinely delicious flavor—too many vibrant treats sacrifice taste for appearance. While I appreciate elaborate decorated cookies requiring artistic skill, these red velvet beauties deliver equally impressive visual impact through inherent characteristics rather than painstaking decoration. The magic happens through chemistry between cocoa, vanilla, and subtle tanginess that defines authentic red velvet character. After countless batches refined through both successes and learning experiences, this recipe continues proving that sometimes the most memorable cookies come from reimagining beloved flavors in new formats rather than creating entirely novel concepts.