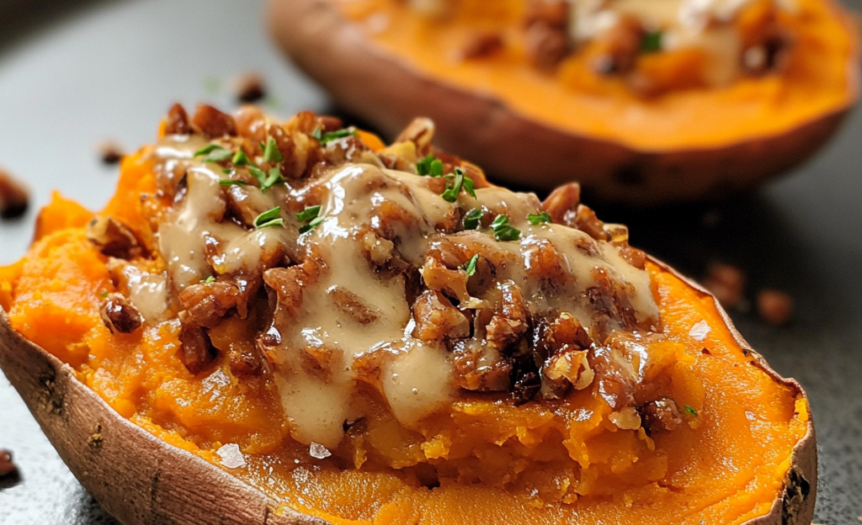
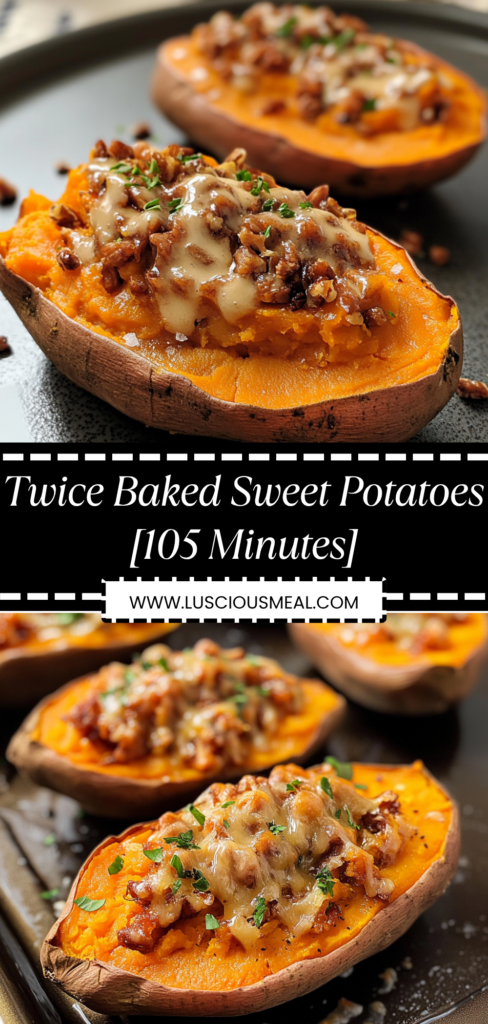
These twice baked sweet potatoes are everything you want in a comfort food side dish – creamy, fluffy sweet potato filling loaded with butter, brown sugar, and warm spices, then topped with a golden, slightly crispy surface that gives way to the most incredible texture underneath. What makes these so special is the double-baking process that transforms ordinary sweet potatoes into something that tastes like a cross between the best sweet potato casserole and the fluffiest mashed potatoes you’ve ever had. I love making these for holiday dinners and special occasions because they look absolutely stunning on the table and can be assembled hours ahead, then just popped in the oven when you’re ready to serve. The 105-minute timeline might seem long, but most of it is hands-off baking time, and the result is so much more elegant and delicious than regular baked sweet potatoes.
Why This Twice Baked Sweet Potatoes Recipe Actually Works
The magic of twice baked sweet potatoes lies in the technique of removing the cooked flesh, whipping it to silky perfection, then returning it to the potato skins for a second baking that creates the most incredible contrast of textures. The first baking breaks down the sweet potato’s starches and concentrates its natural sweetness, while the whipping process incorporates air and butter to create a light, fluffy texture that’s completely different from regular mashed sweet potatoes.
What elevates these from simple to spectacular is the balance of flavors and textures – the sweet potato flesh gets enhanced with butter, brown sugar, and warm spices like cinnamon and nutmeg, while a touch of vanilla adds depth and richness. The second baking creates a slightly caramelized top that contrasts beautifully with the creamy interior, and the potato skins become tender vessels that hold all that deliciousness together. The key is whipping the filling until it’s truly light and airy, which creates that restaurant-quality texture that makes these so special.
Key Benefits That Make This Worth Making
Perfect Make-Ahead Holiday Side – These can be completely assembled hours or even a day ahead and refrigerated, then just baked when you’re ready to serve. This makes them ideal for holiday meals when oven space is precious and you want to minimize last-minute prep work.
Impressive Presentation with Simple Technique – They look incredibly elegant and restaurant-quality on the plate, but the technique is actually quite straightforward. The individual servings make portion control easy and create a beautiful presentation that’s perfect for entertaining or special dinners.
Naturally Sweet and Satisfying – Sweet potatoes are nutritional powerhouses packed with vitamins, fiber, and natural sweetness that makes this feel indulgent while still being relatively healthy. The addition of butter and brown sugar enhances rather than masks the natural potato flavor.
Completely Customizable – The basic technique works with countless flavor variations – you can add pecans or marshmallows for holiday vibes, bacon and cheese for savory versions, or different spices and mix-ins to suit any taste preference or dietary need.
Complete Ingredients Breakdown
4 Large Sweet Potatoes (about 8-10 oz each) Choose sweet potatoes that are firm, smooth-skinned, and roughly the same size so they bake evenly. Look for the orange-fleshed varieties rather than the white ones – they have better flavor and color for this recipe. Avoid any with soft spots, sprouts, or wrinkled skin. The potatoes should feel heavy for their size and have taut, unblemished skin.
4 Tablespoons Unsalted Butter (softened) Use high-quality unsalted butter at room temperature for the best flavor and easiest mixing. The butter should be soft enough to easily press with your finger but not melted or greasy. European-style butter with higher fat content creates even richer, more luxurious results. Let it sit out for about an hour to reach perfect consistency.
2-3 Tablespoons Brown Sugar (packed) Light brown sugar adds moisture and subtle molasses flavor that complements the sweet potato beautifully. Pack it firmly into the measuring spoon to get the right amount. Start with 2 tablespoons and taste – some sweet potatoes are naturally sweeter than others, so you might want to adjust. Dark brown sugar works too but will give a stronger molasses flavor.
1 Large Egg Yolk The egg yolk adds richness and helps bind the filling while contributing to that beautiful golden color when baked. Use a fresh, large egg at room temperature for best results. Save the egg white for another use, or you can whip it to soft peaks and fold it into the sweet potato mixture for extra lightness.
2 Tablespoons Heavy Cream Heavy cream creates the silky, luxurious texture that makes these sweet potatoes so special. Don’t substitute with milk or half-and-half – you need the fat content of heavy cream for the best results. If you don’t have heavy cream, you can use sour cream or cream cheese for slightly different but still delicious results.
1 Teaspoon Vanilla Extract Pure vanilla extract adds warmth and depth that enhances the natural sweetness of the potatoes. Use real vanilla extract, not imitation – the difference is noticeable in a recipe where vanilla is one of the key flavors. The vanilla should smell rich and aromatic, not harsh or artificial.
½ Teaspoon Ground Cinnamon Cinnamon adds warmth and classic fall spice flavor that pairs perfectly with sweet potatoes. Use fresh, high-quality cinnamon for the best flavor – it should smell sweet and aromatic. Ceylon cinnamon is milder and more complex than cassia cinnamon if you can find it.
¼ Teaspoon Ground Nutmeg Freshly grated nutmeg is far superior to pre-ground, but good quality pre-ground nutmeg works fine. Nutmeg adds a warm, slightly sweet spice note that complements cinnamon beautifully. A little goes a long way – too much can be overpowering and bitter.
½ Teaspoon Salt Salt enhances all the other flavors and balances the sweetness perfectly. Use fine sea salt or kosher salt for even distribution. The salt should enhance the natural sweet potato flavor rather than making the dish taste salty.
¼ Teaspoon Black Pepper A small amount of freshly ground black pepper adds subtle complexity and warmth without being detectable as “peppery.” This might seem unusual in a sweet dish, but it adds depth that makes the other flavors more pronounced.
2 Tablespoons Butter (melted, for brushing) This extra butter gets brushed on the potato skins before the second baking to help them become golden and slightly crispy. Use the same high-quality butter, melted until liquid but not browned. This step adds flavor and helps create that beautiful appearance.
Optional Toppings:
¼ Cup Mini Marshmallows If you want that classic sweet potato casserole vibe, mini marshmallows added during the last 10 minutes of baking create a golden, slightly caramelized top. Use fresh marshmallows for the best results – stale ones won’t puff and brown as nicely.
¼ Cup Chopped Pecans Toasted pecans add crunch and nutty flavor that complements sweet potatoes beautifully. Toast them in a dry skillet for 3-4 minutes until fragrant before chopping. Walnuts also work well if you prefer them over pecans.
2 Tablespoons Fresh Chives (chopped) For a savory twist, fresh chives add color and mild onion flavor that’s surprisingly good with sweet potatoes. Use only the green parts, chopped finely. This turns the dish in a more savory direction that pairs well with roasted meats.
Step-by-Step Instructions
1. Preheat your oven to 425°F and line a baking sheet with parchment paper or aluminum foil for easy cleanup. Pierce each sweet potato several times with a fork to prevent them from bursting during baking. The holes should go about ½ inch deep and be spaced around the potato.
2. Place the pierced sweet potatoes directly on the oven rack with the lined baking sheet on the rack below to catch any drips. Bake for 45-60 minutes, depending on size, until they give slightly when gently squeezed and a knife pierces them easily. They should be completely tender throughout.
3. Remove the potatoes from the oven and let them cool for about 10 minutes until they’re comfortable to handle. Reduce the oven temperature to 375°F for the second baking. The potatoes should be soft but still hold their shape – don’t let them get so soft they collapse.
4. Cut each potato in half lengthwise and carefully scoop out the flesh, leaving about ¼ inch of flesh attached to the skin to maintain the potato shell’s structure. Be gentle – you want intact shells that will hold the filling without tearing or collapsing.
5. Place the scooped potato flesh in a large mixing bowl and mash it with a potato masher or large fork until mostly smooth. For the silkiest texture, you can pass it through a fine-mesh strainer or food mill, but this isn’t necessary for delicious results.
6. Add the softened butter, brown sugar, egg yolk, heavy cream, vanilla, cinnamon, nutmeg, salt, and pepper to the mashed sweet potato. Using an electric mixer or vigorous hand mixing, whip the mixture until it’s light, fluffy, and completely smooth. This should take 2-3 minutes with an electric mixer.
7. Taste the mixture and adjust seasoning if needed – you might want more brown sugar if your potatoes aren’t very sweet, or more salt if the flavors seem flat. The mixture should be well-seasoned and taste delicious on its own.
8. Brush the potato skins inside and out with the melted butter, which helps them become golden and adds flavor. Arrange the shells on a baking sheet, cut side up, making sure they’re stable and won’t tip over during baking.
9. Using a spoon or piping bag, fill each potato shell generously with the whipped sweet potato mixture, mounding it slightly above the rim of the shell. You can make decorative swirls with a fork or pipe it for a more elegant presentation.
10. Bake at 375°F for 20-25 minutes until the tops are golden brown and slightly set. If adding marshmallows or nuts, add them during the last 10 minutes of baking. The filling should be heated through and the tops should have a beautiful golden color.
11. Let cool for 5 minutes before serving to allow the filling to set slightly. Garnish with chopped chives, pecans, or any other desired toppings. Serve immediately while hot and fluffy.
Pro Tips & Variations
Make-Ahead Magic: You can complete steps 1-9 up to 24 hours ahead and refrigerate the filled potato shells covered with plastic wrap. When ready to serve, let them come to room temperature for 30 minutes, then bake as directed, adding an extra 5-10 minutes to the baking time since they’re starting cold.
Flavor Variations: For savory versions, omit the brown sugar and vanilla, and add shredded cheese, crispy bacon bits, and green onions. For tropical flair, add shredded coconut and a pinch of lime zest. For fall spicing, add a pinch of ground ginger and allspice along with the cinnamon and nutmeg.
Texture Improvements: For ultra-smooth filling, pass the cooked sweet potato through a food mill or fine-mesh strainer before adding other ingredients. For extra richness, substitute some of the cream with cream cheese or sour cream. For lighter texture, separate the egg and whip the white to soft peaks, then fold it in at the end.
Presentation Tips: For elegant entertaining, use a piping bag with a star tip to create beautiful swirls on top of each potato. You can also make smaller portions by using medium sweet potatoes and serving two halves per person, which looks lovely on individual plates.
Troubleshooting Common Issues
“My potato skins are breaking apart” – This usually happens if the potatoes are overcooked in the first baking or if you scoop out too much flesh. The shells need about ¼ inch of flesh left for structure. Next time, check for doneness earlier and be more gentle when scooping.
“The filling is too wet/runny” – Sweet potatoes vary in moisture content. If your filling seems too wet, you can cook it in a saucepan over low heat for a few minutes to evaporate excess moisture, or add a tablespoon of flour or cornstarch to help it set up.
“They’re not browning on top” – Make sure your oven is properly preheated to 375°F and that you’re baking on the upper third of the oven. You can also brush the tops with a little melted butter or switch to broil for the last 2-3 minutes, watching carefully to prevent burning.
“The flavor seems bland” – This is usually a seasoning issue. Sweet potatoes can vary significantly in natural sweetness and flavor, so always taste your filling before stuffing the shells. Don’t be afraid to add more salt, brown sugar, or spices until it tastes delicious on its own.
“They collapse during the second baking” – This happens if the potato skins are too thin or if the filling is too heavy. Make sure to leave enough flesh in the shells for structure, and don’t overfill them. The filling should mound slightly but not be so heavy it causes the shells to collapse.